-
Welcome to ASR. There are many reviews of audio hardware and expert members to help answer your questions. Click here to have your audio equipment measured for free!
You are using an out of date browser. It may not display this or other websites correctly.
You should upgrade or use an alternative browser.
You should upgrade or use an alternative browser.
KEF LSX Teardown and Repair
- Thread starter FraPia-62
- Start date
FraPia-62
Member
- Joined
- Jul 3, 2024
- Messages
- 17
- Likes
- 151
- Thread Starter
- #22
Hi MaLe-20,
Well, yes, this is exactly the same issue I had. I would say that this demonstrates that there are many KEF LSX speakers around that mounts a C433 capacitor with the wrong voltage rating.
The exact value of the RF choke is not too critical. Since the pads are burned away you will likely need a 1206 part, such that it can be mounted on the remains of the pads. Just pick a 1206 RF choke with an impedance of more than 100 Ohm at 100MHz. I used a muRata BLM31PG121SN1L simply because I readily had it in the lab, but other chokes, maybe with 300-500 Ohm impedance at 100MHz, would be even better.
The three bulged capacitors (Lelon VZH 330uF, 50V) may not need to be replaced, see my reply to sam_adams above. However if you want to be on the safe side you can use Panasonic EEH-ZV capacitors (as proposed by sam_adams) or similar low impedance capacitors.
Thank you for the guide FraPia-62. To test that fault is only in this area I replaced capacitor with 10uF 50V and inductor from a donner board. Circuit shortage was definitely caused by cracked capacitor as short circuit was not shown anywhere else. In my case most of the pad survived however i had to clean some charcoaled pieces. Speaker been tested and now I can order some proper components. Panasonic ZV series doesn't go up to 330uF for 63V, I will need to look for another alternative. For the ceramic capacitor I am planning to replace it with 2.2 or 4.7 uF X7S 1260 and for inductor I will use your recommendation. I have no thermal camera but video linked shows that this area gets quite hot. Once I have all the parts I will give further update.
Thanks to the information FraPia-62 published here I was able to diagnose my KEF LSX that was behaving in the same way. The master speaker played fine for 10-20 minutes though, then a red/orange light and sound went off. I left the speaker on with Spotify only and everything disconnected so that it's clear the problem is isolated on this one and not the secondary.
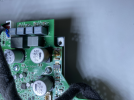
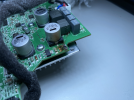
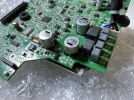
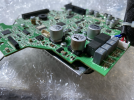
After measuring the capacitor in question, things looked fine. But after closely inspecting the board there is a capacitor half blown off by something small nearby, most probably another capacitor.

Any idea what type and value these two things could be? I may be able to replace the bigger one, but the small cap (if it is a cap) will be tough. Not much space for hot air work in this area. And I'm not sure if there are pads left for the small one.
I was looking for quality speakers for a small room and KEF was like a dream come true. However, used moderately on low volume I would not expect this type of damage. As they are technically on 24/7, I am lucky it didn't cause a fire when nobody was home. So for me, no more KEF from now on.
After measuring the capacitor in question, things looked fine. But after closely inspecting the board there is a capacitor half blown off by something small nearby, most probably another capacitor.
Any idea what type and value these two things could be? I may be able to replace the bigger one, but the small cap (if it is a cap) will be tough. Not much space for hot air work in this area. And I'm not sure if there are pads left for the small one.
I was looking for quality speakers for a small room and KEF was like a dream come true. However, used moderately on low volume I would not expect this type of damage. As they are technically on 24/7, I am lucky it didn't cause a fire when nobody was home. So for me, no more KEF from now on.
Hi, I checked the picture I had and indeed this is a small capacitor. I am still waiting for components so I have my speaker partially assembled. Should be able to take a part and measure values for you later today and take a picture with tracks as you will need to regenerate some of them. C442 is cracked on your picture and this is what probably caused a short circuit causing small cap to blown. I would be more worried about the IC as it is in close proximity. But another evidence of stressed cap makes me worried and question quality of some of the components.

FraPia-62
Member
- Joined
- Jul 3, 2024
- Messages
- 17
- Likes
- 151
- Thread Starter
- #28
Hi,
This is a new failure related to ceramic caps. It really appears that incorrect capacitors were mounted. A ceramic capacitor, when used within its ratings, should not burn in that manner. Unfortunately, I no longer have the speakers with me as I returned them to its owner. However, upon reviewing the photographs, the damage may not be too severe. If you still have the speakers and you would like to make a final attempt to fix them, I can give the following suggestion:
This is a new failure related to ceramic caps. It really appears that incorrect capacitors were mounted. A ceramic capacitor, when used within its ratings, should not burn in that manner. Unfortunately, I no longer have the speakers with me as I returned them to its owner. However, upon reviewing the photographs, the damage may not be too severe. If you still have the speakers and you would like to make a final attempt to fix them, I can give the following suggestion:
- C442 and C443 are mounted close to the TPS5430 converter and seem to be connected to pin 6 (GND) and pin 7 (VIN) of the TPS5430. If so, they should be power supply decoupling capacitors. The TPS5430 requires good decoupling between VIN and GND, so most likely they are connected there. The only other capacitor connected close to the TPS5430 is the 10nF bootstrap capacitor C444, close to pin 1. The solder on pin 7 has melted, so it really looks like there is a copper track between C443 and pin 7. Try to check with a multi-meter if the connections are indeed there or not.
- C443 could be replaced with a 0603, 4.7-10nF 64V X7R capacitor, while C442 could be replaced with a 1206, 2.2-4.7uF 64V X7R capacitor.
- Since the solder pads appear to be missing, you could attempt to mount C443 directly over pins 6 and 7 of the TPS5430. Meanwhile, C442 could be mounted on one side on the remaining GND pad, with the other side connected to pin 7 and the power supply (the track that detached when heated) using a thin copper wire. It may not be clean, but it should function.
- Use 64V ceramic capacitors. Voltage derating is required, it is not a luxury for high-reliability electronics.
- Use X7R, or maybe Y5R, capacitors. Avoid Y5V or Z5U capacitors, they are inexpensive but have very large tolerances and voltage coefficients.
FraPia-62 you are awesome and I appreciate highly all your efforts to help. I came to the same conclusion after reading TPS5430 information and specs, however, I don't feel very comfortable running this "solution". It's high-end equipment after all which (I assumed wrongly) should run reliably for years without exploding or giving out sparks and smoke. I had it connected to other rather expensive equipment like Universal Audio interface or Mac Studio and I want to avoid more damage than there currently is. The cracked capacitor left a hole that seems to go through PCB layers and I cannot say whether it can cause some more issues. Popping caps here and there in equipment connected 24/7 is a big nono.
I reached out to KEF asking for the price of a new board or a full speaker, but I don't think it will be a friendly price. My trust in product quality is close to none after this and the only reason I am still looking into it is because I also have a woofer (that one still runs fine). Most probably I'll replace LSX with studio monitors but the KEF woofer doesn't have output so I'd need a crossover to use it. Guess I'll just forget about KEF with a bitter taste in my mouth and continue with equipment that is cheaper but reliable.
I reached out to KEF asking for the price of a new board or a full speaker, but I don't think it will be a friendly price. My trust in product quality is close to none after this and the only reason I am still looking into it is because I also have a woofer (that one still runs fine). Most probably I'll replace LSX with studio monitors but the KEF woofer doesn't have output so I'd need a crossover to use it. Guess I'll just forget about KEF with a bitter taste in my mouth and continue with equipment that is cheaper but reliable.
Hi MCH,
The breakdown voltage of a dielectric depends on its thickness. I thus compared the thickness of the layers of the broken capacitor, as seen through the cracks with a microscope, with that of similar high capacitance capacitors with known operating voltage and dielectric type. The method is not very accurate given that not all ceramics are equal and the layers are very thin, but it is sufficient to get an estimate of the rated voltage of the capacitor. A more accurate analysis would require as a minimum the preparation of a microsection of the broken capacitor and an analysis with a more powerful microscope. Well, too expensive to do.
Yes, I measured the supply voltage of the power amplifier to check that it was present, but I forgot to annotate it. As far as I remember it was around 30-35V.
The output filter of the tweeter amplifier is indeed smaller than that of the woofer amplifier.
I do hope you realise that by showing such knowledge and experience/expertise that you will now be inundated with “d’ya think you could have a quick look at this………” requests.
Last edited:
I agree with FraPia-62 and issue might be a bit bigger. I am probably going to have a closer look at some other caps that are installed in a higher voltage sections. Sounds to me like a cost reduction exercise in which some of the components were pushed to the limits.
thanks FraPia-62 you are a legend!
I have opened my active speaker last night and tada - same issue!
in my case all three capacitors (C433, C435, C434) are shorted plus the RF choke
what ceramic capacitors would you use to replace C434 and C435?
I have opened my active speaker last night and tada - same issue!
in my case all three capacitors (C433, C435, C434) are shorted plus the RF choke
what ceramic capacitors would you use to replace C434 and C435?
Attachments
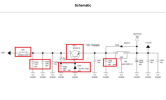
I've managed to get part of the schematics from KEF Support, they wouldn't send the whole document as parts of the items are still in use and not open for everyone.
quality of the picture is how I received it, but I confirmed the numbers of the capacitors:
* L236 MI0805J102R-10
* C433 10uF 50V
* C434 104 50V
* C435 103
quality of the picture is how I received it, but I confirmed the numbers of the capacitors:
* L236 MI0805J102R-10
* C433 10uF 50V
* C434 104 50V
* C435 103
Attachments
FraPia-62
Member
- Joined
- Jul 3, 2024
- Messages
- 17
- Likes
- 151
- Thread Starter
- #36
Hi mar1in,I've managed to get part of the schematics from KEF Support, they wouldn't send the whole document as parts of the items are still in use and not open for everyone.
quality of the picture is how I received it, but I confirmed the numbers of the capacitors:
* L236 MI0805J102R-10
* C433 10uF 50V
* C434 104 50V
* C435 103
Just replace the damaged components with the same specified by KEF. 104 means 100nF, 103 means 10nF, both X7R. Actually I would take a little more voltage margin and use 63V parts, however 50V is still OK.
Thank you so much FraPia-62!
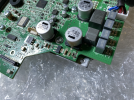
I've ordered those and decided to replace it myself as I couldn't wait any longer. Soldering was challenging as I have never done that with SMD components before but I've managed. And at the end it worked, they turned on and I'm currently listening to them as I write this.
I've ordered those and decided to replace it myself as I couldn't wait any longer. Soldering was challenging as I have never done that with SMD components before but I've managed. And at the end it worked, they turned on and I'm currently listening to them as I write this.
Attachments
That is pretty good for rosin core no liquid flux SMD soldering. Actually it's really good for a first time job.Thank you so much FraPia-62!
I've ordered those and decided to replace it myself as I couldn't wait any longer. Soldering was challenging as I have never done that with SMD components before but I've managed. And at the end it worked, they turned on and I'm currently listening to them as I write this.
Is the original inductor somewhere inside the speaker or did it vaporizeThank you so much FraPia-62!
I've ordered those and decided to replace it myself as I couldn't wait any longer. Soldering was challenging as I have never done that with SMD components before but I've managed. And at the end it worked, they turned on and I'm currently listening to them as I write this.
Similar threads
- Replies
- 0
- Views
- 552
- Replies
- 2
- Views
- 877
- Replies
- 18
- Views
- 2K
- Replies
- 47
- Views
- 17K
- Replies
- 3
- Views
- 1K
