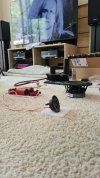
• WANTED: Happy members who like to discuss audio and other topics related to our interest. Desire to learn and share knowledge of science required. There are many reviews of audio hardware and expert members to help answer your questions. Click here to have your audio equipment measured for free!

CSS Criton 1TD-X "living room" build

IliaV

Member
Joined
Jun 17, 2022
Messages
8
Likes
48
Hi All,

I'd be happy to photo-log my DIY work on building my CSS Criton 1TDX speakers. I'm not a woodworker neither an electrical engineer (though have some understanding of the former), however I'm really pleased with the result. Another important thing to mention - I've made all my build steps literally in my living room, with some dust-intense sanding and trimming done on the balcony :)

I'd like to thank my beloved wife for being stoically calm and supportive despite the mess I turned our appartment into in the recent weeks :facepalm:
Another kudos goes to well known Peter Rawlings, who in fact teached me the basics of wood working and veneering with his "hair-splitting techinque" videos. That was my first DIY cabinet assembly!

The project is still not finished as I planned it, I'll be publishing additions in the thread as soon as I get back to it. I need to purchase 3D printer (it's not just for me, my wife has her hobbies as well;)) so I'm planning to do CSS logo on speaker's front pabnel and magnetic grills.

20220616_091303.jpg

20220616_091354.jpg
 
Last edited:
OP
I

IliaV

Member
Joined
Jun 17, 2022
Messages
8
Likes
48
I don't have any photos of the cabinet gluing part, unfortunately.. But that was not too complicated.
The sanding took a while though.. I don't have an orbital sander so I was exercising with the sanding block o_O

After having that done, I've marked small magnets and embedded them into the front panel

20220530_233149.jpg
20220530_233828.jpg
20220531_000718.jpg
 
Last edited:
OP
I

IliaV

Member
Joined
Jun 17, 2022
Messages
8
Likes
48
I used an iron-on veneering method, was pretty striclty following all Peter's recomendations. I did a few mistakes, but I managed to (almost) fix them. don't think anybody (non-professional) would notice.

20220612_135731.jpg

20220612_141942.jpg
20220612_152751.jpg
20220612_161039.jpg
20220612_173903.jpg
20220612_174708.jpg
20220612_200612.jpg
20220612_222309.jpg
20220612_222441.jpg
20220612_223205.jpg
 
Last edited:
OP
I

IliaV

Member
Joined
Jun 17, 2022
Messages
8
Likes
48
I've modified the crossover layout a bit (surely without actually changing any schematics). I felt like the kit's one was not optimal in terms of adding addional patches. Danny did a great video about XLS-Encores crossover assembly. I'm hundreds lightyears far from his skills, but learned some suff, i.e. solder should hold the connection and not "be" the connection, it's always better to not cut the wire, etc.. My layout is for sure not ideal, but I belive it's a small step forward compared to a standart one.

I had some leftovers of Canare 4S11 cable that I used to do my speaker cables, so I used 14 AWG wires for my build. I felt like the standart suplied is kind of crapy, though I don't really think the difference would've been audible.

20220614_152603.jpg
20220614_152617.jpg
20220614_221751.jpg
20220613_225632.jpg


I run some "eye of a tiger" crossover testing right on the living room's carpet.

20220614_135745.jpg
 

Attachments

  • 20220614_135831.jpg
    20220614_135831.jpg
    211.5 KB · Views: 239
Last edited:
OP
I

IliaV

Member
Joined
Jun 17, 2022
Messages
8
Likes
48
Finishing was exciting. I used water-based matte polyurethane I bought from home depot.. That possibly was notthe best idea. It added just a tiny bit of dark coloration to the final look, which I tried to avoid. I made 4 coats total. I used white oak veneer, and that one is very porous. First coat it was literally drinking the poly. I sanded the raised grain after first coating with 150 grit. Second coating - lightsanded with 240, 3rd - lightsanded with 320. And finished with 400 grit after the fourth coat.
20220615_152511.jpg

20220615_144132.jpg
20220615_144149.jpg
20220615_173606.jpg
20220615_173657.jpg
20220615_173855.jpg
 
Last edited:
OP
I

IliaV

Member
Joined
Jun 17, 2022
Messages
8
Likes
48
Final assemble went pretty smooth, except I forgot to predrill crossover's mounting holes in the cabinet bottom. It could've turned into complete disaster, if my wife didn't lend me her Dremel Variable Speed Corded Rotary Tool, which was small enough to fill into the cabinet and do the job. The foam that comes with the kit is almost not sufficient to cover the whole cabinet internals. I used some additional from the crossover part's shipping box.

20220615_225654.jpg
 
Last edited:
OP
I

IliaV

Member
Joined
Jun 17, 2022
Messages
8
Likes
48
That's all for now folks!

As I wrote before, next step would be printing and 3D-printing of logos and grills. i hope it comes in some nearest future.

20220616_091304.jpg
20220616_091354.jpg
20220616_091413.jpg


Make sure your wife will not see the following.
That's how your living room will be looking like if you decide to go this route.

20220615_152522.jpg
 

Doodski

Grand Contributor
Forum Donor
Joined
Dec 9, 2019
Messages
21,576
Likes
21,866
Location
Canada
That's all for now folks!

As I wrote before, next step would be printing and 3D-printing of logos and grills. i hope it comes in some nearest future.

View attachment 213142View attachment 213143View attachment 213144


Make sure your wife will not see the following.
That's how your living room will be looking like if you decide to go this route.

For homebrew/assembled in the living room those appear excellent. Well done! :D
 

groovybassist

Active Member
Forum Donor
Joined
Dec 11, 2020
Messages
158
Likes
284
Location
Wendell, NC
That's all for now folks!

As I wrote before, next step would be printing and 3D-printing of logos and grills. i hope it comes in some nearest future.

View attachment 213142View attachment 213143View attachment 213144


Make sure your wife will not see the following.
That's how your living room will be looking like if you decide to go this route.

Great looking build! I’d like to hear these speakers some day as they get plenty of positive feedback.
 
OP
I

IliaV

Member
Joined
Jun 17, 2022
Messages
8
Likes
48
Doodski, groovybassist, AudioAaron - thanks a lot for your evaluations! :)

Great build and good photo documenting. Whered you get the veneer from?
That was the place Peter Rawlings linked to his veneering video, it's called veneersupplies dot com. I used Paper-Backed (10 mil) White Oak Veneer, 4' x 8', Plank-Matched. I was generally satisfied with the sheet I got, but, even though the size could have fit two pairs of 1TDx speakers, I used it all. The reason was - one of the plank cuts was not nicely matched in the second part of the sheet - it got gradually darker along the grain, making the color difference and so the seam too apparent in the second half of the sheet. I'll try ordering "architectural grade" piece next time to avoid that. Second - I tried making both speakers look the same, at least from the front, and so that influenced the cutting layout, making it much less optimal from the material usage point.

Btw, I'd be happy to answer any questions and share my experience. One of the goals of logging my progress here was to inspire people to go with DIY even though they are still in doubt. That's pretty much doable, even if you don't have a nice garage full of woodworking tools.
 

walkingdogs

New Member
Joined
Aug 2, 2022
Messages
1
Likes
0
Brand new member here and i joined because of build logs like this, and specifically the CCS Criton line. I'm planning on doing the 2TD-X build in the coming months and I have to say you are now my inspiration! I presume that you just used the flat pack they sell and just routed the front panel to give it the round bevel? That's definitely something I'm looking at doing so as to have a clean veneer wrap like you achieved and I'm glad to see how it looks. You also did the magnetic grill idea that I was thinking of and see you mention a 3D printer above for producing those. Really hope to see an update once those are finished and I would love to possibly enlist you in making a pair for me once the time has come if you're interested. I found one retailer online that does custom speaker grills, but I really like the idea of 3D printed ones. Congrats on your build, and they look gorgeous! I really wish I could hear a pair before buying but between hearing what Randy thecheapaudioman and Ron with New Record Day had to say on them, I feel really comfortable taking a blind flier on them.
 

michael2v

New Member
Joined
Jan 21, 2023
Messages
2
Likes
2
I used an iron-on veneering method, was pretty striclty following all Peter's recomendations. I did a few mistakes, but I managed to (almost) fix them. don't think anybody (non-professional) would notice.View attachment 213117
These look fantastic, you've really inspired me to try this with my own build! Are there any online references you'd recommend for instructions? I'm particularly curious about the kind of glue that's used and the best way to trim the veneer edges after it's applied to the cabinet (I understand many will use a router for the driver openings), before sanding / filing. Thanks in advance!

Edit: I see you mentioned Peter Rawlings so I just found his Youtube channel (and I managed to find the Heat Lock glue); in my excitement after seeing your finished product I neglected to do some of my own homework. :)
 
Last edited:

carbidetooth

Member
Joined
Sep 3, 2020
Messages
63
Likes
101
Location
Boise, ID
These look fantastic, you've really inspired me to try this with my own build! Are there any online references you'd recommend for instructions? I'm particularly curious about the kind of glue that's used and the best way to trim the veneer edges after it's applied to the cabinet (I understand many will use a router for the driver openings), before sanding / filing. Thanks in advance!

Edit: I see you mentioned Peter Rawlings so I just found his Youtube channel (and I managed to find the Heat Lock glue); in my excitement after seeing your finished product I neglected to do some of my own homework. :)
If you haven't found it already, I link most everything I use in the video descriptions. When possible, I link to manufacturer's product page, thus leaving shopping to the individual. Heat Lock is unique though, and only available form Veneer Supplies. They also have a lot of good information pertaining to veneering.
 

chang

Active Member
Joined
Apr 6, 2022
Messages
152
Likes
44
Hi All,

I'd be happy to photo-log my DIY work on building my CSS Criton 1TDX speakers. I'm not a woodworker neither an electrical engineer (though have some understanding of the former), however I'm really pleased with the result. Another important thing to mention - I've made all my build steps literally in my living room, with some dust-intense sanding and trimming done on the balcony :)

I'd like to thank my beloved wife for being stoically calm and supportive despite the mess I turned our appartment into in the recent weeks :facepalm:
Another kudos goes to well known Peter Rawlings, who in fact teached me the basics of wood working and veneering with his "hair-splitting techinque" videos. That was my first DIY cabinet assembly!

The project is still not finished as I planned it, I'll be publishing additions in the thread as soon as I get back to it. I need to purchase 3D printer (it's not just for me, my wife has her hobbies as well;)) so I'm planning to do CSS logo on speaker's front pabnel and magnetic grills.

Great post, think I'm about to take the plunge. What size roundover did you use?
 
Top Bottom