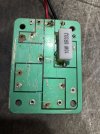
I finished the crossover finally. Fired-up REW, measurement is 1/1 smoothing. Blue is stock, and green is with the
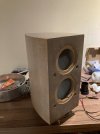
@Dennis Murphy mod. I could use some help with veneering the curved portion of the cabinets if anyone has any tips. I would also like to add this was my first time working with crossovers. I didn't even know how to read the schematic. I saw someone selling a pair of these speakers, but they were beaten up, so I removed all the vinyl wrap. I am currently patching, sanding and dampening the cabinets.
I want to thank everyone on Audio Science Review for their contributions.
@amirm has created something similar to
SCI-HUB .
View attachment 353828

")