I've just emailed [email protected], and Gianluca seems to have done most, if not all, the replies. Super prompt and helpful.Do you have a contact at Modus Shop?

-
WANTED: Happy members who like to discuss audio and other topics related to our interest. Desire to learn and share knowledge of science required. There are many reviews of audio hardware and expert members to help answer your questions. Click here to have your audio equipment measured for free!
You are using an out of date browser. It may not display this or other websites correctly.
You should upgrade or use an alternative browser.
You should upgrade or use an alternative browser.
DIY Purifi Amp builds
- Thread starter JimB
- Start date
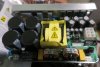
Pretty sure there's room on either side of the SMPS for an LED, probably even a switch.If you place it so that it directly abuts the front panel, that will make it difficult to even place an on/off led light.
Give us some pictures")
All I've got for now. Hopefully finally get to start drilling soon.
BTW, dunno how I missed this, but Purifi is shipping the full cable assortment with the EVAL1 kit, which includes the plug end for the SMPS1200 as well. So of course I ordered another identical cable setup from Purifi, and yet another similar from Hypex, because, you know, just in case. Yeah, bad reading comprehension = extra cables.
Attachments
Mine did not come with the cables, I had to order them separately from Purifi. No need to order any cables from Hypex, however. Also, if you just want to retain the standby switch on the Eval 1, there's no need to add Nampon or Nfail wires to the 3 wire low voltage set up and you can just use the 7 slot white plug and just plug the 3 crimped wires into it, and insert it into the receptacle on the SMPS end and you'll be good to go.All I've got for now. Hopefully finally get to start drilling soon.
BTW, dunno how I missed this, but Purifi is shipping the full cable assortment with the EVAL1 kit, which includes the plug end for the SMPS1200 as well. So of course I ordered another identical cable setup from Purifi, and yet another similar from Hypex, because, you know, just in case. Yeah, bad reading comprehension = extra cables.
Last edited:
OP
- Thread Starter
- #1,225
SpeakON and banana?... BTW, dunno how I missed this, but Purifi is shipping the full cable assortment with the EVAL1 kit, which includes the plug end for the SMPS1200 as well. So of course I ordered another identical cable setup from Purifi, and yet another similar from Hypex, because, you know, just in case. Yeah, bad reading comprehension = extra cables.
I had no problem installing a front panel power switch with build-in led.If you place it so that it directly abuts the front panel, that will make it difficult to even place an on/off led light.
Yup, see page 57 for details.SpeakON and banana?
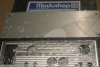
View attachment 68975
@tlag It’s looks nice. Have you engraved rectangle reducing thickness from 3mm to 2mm on the back side of rear panel or on interior side?
I think I am going to use neutrik connectors for everything (RCA/XLR/speakON) and either desolder the EVAL1 connectors or use an alternative buffer board. This also has the advantage of not needing something precisely machined out since only rough circular holes are necessary for the neutrik connectors and the connector flange covers the hole for a clean presentation. What to wire them up with? Direct to the board with 10/11 ga? Or perhaps I should use some kind of spade or screw terminal.
Last edited:
Good catch! Drawing actually calls for exterior to be thinned, but this panel came with interior. Was mildly surprised by that, but I think it should work.Yup, see page 57 for details.
@tlag It’s looks nice. Have you engraved rectangle reducing thickness from 3mm to 2mm on the back side of rear panel or on interior side?
EDIT: I just checked the fit. It fits, but tolerances on board are such that the outputs will be shorted.
Last edited:
Good catch! Drawing actually calls for exterior to be thinned, but this panel came with interior. Was mildly surprised by that, but I think it should work.
EDIT: I just checked the fit. It fits, but tolerances on board are such that the outputs will be shorted.
Pics of fit?
OP
- Thread Starter
- #1,231
How? The EVAL1 output sockets are fully insulated. Picture(s)?... I just checked the fit. It fits, but tolerances on board are such that the outputs will be shorted.
EDIT: Oh. Is this from thinning the interior, leading to an under-hang of the raw Al on the back panel touching traces on the board?
How? The EVAL1 output sockets are fully insulated. Picture(s)?
EDIT: Oh. Is this from thinning the interior, leading to an under-hang of the raw Al on the back panel touching traces on the board?
Yes, the output jack solder fillets (*very* close to PCB edge) more or less touch the raw/anodized Al bottom horizontal inside corner of the recess. I'm gonna keep this back panel and go ahead and chamfer the corner and perhaps tape the panel/fillets, but definitely an electrical issue as it sits. At the very least the recess bottom edge should be lowered a couple mm. The PCB is really meant to be butting a flat plate: <1mm clearance to edge.
I understand that Modushop did it this way for aesthetics, but keep in mind it is 1mm off the drawing, so CNC'd bottom holes will need to be adjusted accordingly. Personally, I'll be ecstatic to have <1mm tolerances in my marking/drilling!
OP
- Thread Starter
- #1,233
I have heard from Ghent that they have issued orders for their first design plans for aluminum work. So maybe they will have first prototype parts to inspect in a couple weeks. Depending on the results, allow a few more weeks for a first batch of parts for third party inspections and qualifications. Then, production. So, I'd expect it to be many weeks off to be able to get cases from them, but I'm very much anticipating being able to get on with my builds before summer ends!
Since I have mentioned ASR to them, previously, they also responded that they have received emails from some people, but have too little time now to respond to them, individually, while they have nothing clear to offer - not even commitments. They said they wished to "apologize to these audiophiles" and "thanks for the attention of the audiophiles".
Since I have mentioned ASR to them, previously, they also responded that they have received emails from some people, but have too little time now to respond to them, individually, while they have nothing clear to offer - not even commitments. They said they wished to "apologize to these audiophiles" and "thanks for the attention of the audiophiles".
Finally got the 300 mm Ghent case to a local shop to have a new back panel fabricated and mounting holes drilled for the Eval 1 board in the case bottom. Person who looked at the project said it will not be a problem, and will be ready in a week and a half. Guess I can come off the valium drip.
Will keep everyone posted b/c using a Ghent Case with a redone back panel +new drill holes for Eval 1 will be an ultra easy and soldering free way to bring this project to completion.
Edit: It will be nice for everyone to have a high quality option works for certain option for anyone who wants to use a Ghent case and doesn't want to wait for him to make a bespoke model.
Last edited:
OP
- Thread Starter
- #1,235
As of now, your version is unique! And it will still be special, later, because you implemented a 300mm wide amp (Ghent standard model expected to be 250mm).Finally got the 300 mm Ghent case to a local shop to have a new back panel fabricated and mounting holes drilled for the Eval 1 board in the case bottom. Person who looked at the project said it will not be a problem, and will be ready in a week and a half. Guess I can come off the valium drip.
Will keep everyone posted b/c using a Ghent Case with a redone back panel +new drill holes for Eval 1 will be an ultra easy and soldering free way to bring this project to completion.
Edit: It will be nice for everyone to have a high quality option works for certain option for anyone who wants to use a Ghent case and doesn't want to wait for him to make a bespoke model.
I'm going to post the name of the shop where I had this done. They will have the cad drawings. Really nice, since the entire name of the game is getting the holes drilled so they are in the exact required relation to each other so as to allow for a simple screw together assembly. And this work will , no doubt, be transferrable to other cases as well.As of now, your version is unique! And it will still be special, later, because you implemented a 300mm wide amp (Ghent standard model expected to be 250mm).
At the very least, it will give DIYers in the US an in-country option.
Last edited:
OP
- Thread Starter
- #1,237
Did they also drill the case bottom? Please post pictures of the parts as you get them, and your build!I'm going to post the name of the shop where I had this done. They will have the cad drawings. Really nice, since the entire name of the game is getting the holes drilled so they have in the exact required relation to each other to allow for a simple screw together assembly. And this work will, no doubt be transferrable to other cases as well.
At the very least it will give DIYers in the US an in-country option.
Yes, they are drilling the case bottom. I will be using the existing bannana plugs and XLR, but I have removed the standby switch. Currently the case bottom and the Eval 1 unit are at the shop, so they will be able to create a perfect fit so the bottom holes are right where they need to be to line up the Eval 1 inputs and outputs on the newly fabricated case back plate. That's why it would be so great for anyone who is purchasing a Ghent case and wants to adapt it to the Purifi. The shop will have the CAD drawings to do that as a consequence of doing my job.Did they also drill the case bottom? Please post pictures of the parts as you get them, and your build!
Won't have anything back until next week at the earliest, but I will keep everyone posted. And I will tell them about the possibility of attracting new business. Going to instruct them that they need to measure the six screw holes for the SMPS1200, and include it on any CAD drawing, so they can convert any case at that point. Won't even have to be a Ghent case, as long as they have the pattern, now will it?
Last edited:
OP
- Thread Starter
- #1,239
You can send them the dimensioned drawings on the datasheets of the relevant parts from Hypex and Purifi.Yes, they are drilling the case bottom. I will be using the existing bannana plugs and XLR, but I have removed the standby switch. Currently the case bottom and the Eval 1 unit are at the shop, so they will be able to create a perfect fit so the bottom holes are right where they need to be to line up the Eval 1 inputs and outputs on the newly fabricated case back plate. That's why it would be so great for anyone who is purchasing a Ghent case and wants to adapt it to the Purifi. The shop will have the CAD drawings to do that as a consequence of doing my job.
Won't have anything back until next week at the earliest, but I will keep everyone posted. And I will tell them about the possibility of attracting new business. Going to instruct them that they need to measure the six screw holes for the SMPS1200, and include it on any CAD drawing, so they can convert any case at that point. Won't even have to be a Ghent case, as long as they have the pattern, now will it?
They already have all that along with the case bottom, the back of the original Ghent case and the Eval 1 Unit itself. They are going to have a definitive solution for drilling any case very soon now.You can send them the dimensioned drawings on the datasheets of the relevant parts from Hypex and Purifi.
Similar threads
- Replies
- 0
- Views
- 548
- Replies
- 3
- Views
- 1K