
Intro:
Required Steps:
Optional Steps (but useful to verify to avoid problems):
How to do this for iOS?
How to do this for Android?
Changelog:
Conclusion:
- After sunrise, 99% of the websites I visit will show a light mode/background.
- After sunset, 99% of the websites I visit will show a dark mode/background.
- Automated Light/Dark mode achieved.")
>>>>>>>>>>>>>>>>>>>>>>>>>>>>>>>>>>>>>>>>>>>>>>>>>>>>>>
IGNORE THIS:
Intro:
Windows 11 Requirements:
How to check whether your current computer is officially supports Windows 11? (optional step)
What if your current hardware is currently not support by Microsoft to install Windows 11?
Don't have a Windows computer, but have a MacOS instead?
How to download latest genuine Windows 11 ISO?
Create a bootable USB thumb drive:
How to disable any 3rd-party applications/shortcuts on your start menu, once Windows 11 boots?
How to install Windows 11, as a local account, bypassing the use of a "Microsoft account", which links your email to Microsoft?
Problem #1: How to clear up extra 1GB of RAM?
Problem #2: Since the introduction of Windows 10, and then Windows 11, Windows is tracking your every click, action, on your computer.
Problem #3: How to further customize Windows
Problem #4: Lack of automatic light or dark mode
Here's how I setup my operating system to have dynamically changing theme (either Light or Dark) based on the time of day.
At the same time, the websites I visit will dynamically change their wallpaper/background, to be either Light or Dark.
Beyond the initial setup, I don't have to do anything manually since the system will run automatically.
At the same time, the websites I visit will dynamically change their wallpaper/background, to be either Light or Dark.
Beyond the initial setup, I don't have to do anything manually since the system will run automatically.
Required Steps:
1. For Desktop OS's
1A) If you use MacOS, go to settings, appearance, set to 'Auto'.
- after sunrise, MacOS sets the system colors/menus to Light mode.
- after sunset, MacOS sets the system colors/menus to Dark mode.
- i set it to 'Auto', so I don't have to toggle this manually.
1B) If you use Windows, you won't be able to change from Light to Dark mode automatically, since Windows can only set either Light or Dark mode manually (for some reason).
But if you install an open-source program called AutoDarkMode (from github), and enable it to auto-start on Windows startup, it will dynamically change your Window's system mode automatically.
2. Install a browser extension that darkens website background color.
In your browser of choice (Chrome, Firefox, Safari, or Edge), install 'dark reader' (website).
This is an open-source browser extension that protects your privacy by default, hence my recommendation.
Cllck on it's 'icon' in the menu bar, to configure these 2 options:
2A) enable 'detect dark theme' (under 'configure website toggling').
- this will force the extension to detect whether the current website is showing in dark mode.
- if the extension detects that the website shows in dark mode, then the extension won't activate (if your MacOS/Windows is already set to Dark mode).
- if the extension detects that the website shows in light mode, then the extension will activate (if your MacOS/Windows is already set to Dark mode).
- the extension won't activate at all (if your MacOS/Windows is already set to Light mode).
2B) enable 'use system color scheme' (under 'on/off' button).
- this will force the extension to use MacOS/Windows mode we defined earlier.
3. For Desktop Browsers:
These options below effectively ignore the browser's own preference and instead uses Operating System's preference we set earlier.
- If you're using Chrome, go to Settings, Appearance, set the "Mode" to "Device".
- If you're using Brave, go to Settings, Appearance, set "Brave colors" to "Same as OS".
- If you're using Firefox, go to Settings, General, set "Website Appearance" to "Automatic".
- If you're using Edge, go to Settings, Appearance, set "Overall Appearance" to "System Default".
- If you're using Safari (for MacOS), then you don't need to do anything.
- If you're using Opera, go to Settings, Appearance, set "Theme" to "System"
Optional Steps (but useful to verify to avoid problems):
1. Homepage.
I set my homepage as google.ca and logged into my google account, then go to 'Settings' on bottom right corner of screen, then 'Search Settings', then Other Settings', under 'dark theme', change to 'device default'.
- which typically sets my homepage's background's color manually.
- I set it to 'device default', in order to use MacOS/Windows mode we defined earlier.
Repeat similar steps, for other homepages, if needed.
2. Youtube.
On Youtube.com, once logged in, click on your name on top-right corner, select 'appearance', change from 'dark/light theme' to 'use device theme'.
- which typically sets the youtube background's color manually.
- i set it to 'use device theme', in order to use MacOS/Windows mode we defined earlier.
How to do this for iOS?
- Dark Reader is also available for iOS, as a Safari extension, for US$4.99 (iOS Link). It works well with iOS's system Light/Dark mode. It changes websites to dark mode when the iOS mode is dark and doesnt activate for websites when the iOS mode is light. It can also detect if websites have a dark background already. To change the settings, open Safari (browser), hit the aA icon, select the extension, enable it for 'all websites', then select 'Dark Reader', set it to 'Auto', then hit the 'settings' button, and enable 'detect dark theme'.
- If you don't wish to pay US$4.99, then here's free options (that I've tested and worked) and that were recently updated:
1. Nitefall: Browser dark mode (iOS Link)
- Once installed, open Safari, hit the aA icon, select the extension, enable it for 'all websites'.
Other available iOS apps, but I don't recommend due to issues listed:
1. Darker - Dark Mode for Safari (iOS Link) - Last updated Dec 2022.
2. Hyperweb (iOS Link) - Last updated March 2023.
3. Dark Mode + (iOS Link) - Last updated Never.
4. Dark Mode for Safari: NightEye (iOS Link) - Free to install, but activates a free trial for a few months right away, which means it won't be free.
5. Dark Night Browser (iOS Link) - Not a Safari extension, just another browser (questionable source).
6. Dark Mode + For Safari Browser (iOS Link) - Seems to be subscription model.
How to do this for Android?
- Dark Reader is also available for Android. See link for explanation how.
Changelog:
- 2023-11-06: Launched
- 2023-11-08: Re-organized
- 2023-12-01: Added Spoilers
- 2023-12-09: Added free alternative options for iOS, since Dark Reader is paid for iOS (US$4.99).
- 2023-12-13: Added notes for all major desktop browsers (Chrome, Firefox, Brave, Edge, Safari for MacOS)
- 2023-12-15: Added notes for Opera
- 2023-12-17: Added notes about Dark Reader being open-source and doesnt track you, which is why I'm recommending it over others.
Conclusion:
- After sunrise, 99% of the websites I visit will show a light mode/background.
- After sunset, 99% of the websites I visit will show a dark mode/background.
- Automated Light/Dark mode achieved.
>>>>>>>>>>>>>>>>>>>>>>>>>>>>>>>>>>>>>>>>>>>>>>>>>>>>>>
IGNORE THIS:
TEST 1: Normal browsing, not incognito browsing
Github page. Test page.
I enabled Enabled 'maximum protection' settings
Github page. Test page.
I enabled Enabled 'maximum protection' settings
| Desktop Browser | Did this browser pass the test? |
| Safari for MacOS | b6cc267b689852cb1f0a4cc2151efe5cb4637d23 16 429891f6545696b2bf276203447c1027743bc033 1 73adce585943e240decf0ea5d5fe4fc320e756ef 1 266555f57d4870635527eb095a6a6b59ff07bb1f 1 ab376ede9cfe6b3b3111484a25e7fed6b02a2645 1 in 20 tries, there were 5 unique ID's. 25% success rate. |
| Chrome | failed, same ID everytime |
| Firefox | failed, same ID everytime |
| Edge (default browser) | failed, same ID everytime |
| Brave | failed, same ID everytime |
| Opera | failed, same ID everytime |
| DuckDuckGo | e8a89d2a8d83bff1e6b4c272eeac337f7429ee23 7a3e6b5e19363258ddc755427465bc0896207a71 b6cc267b689852cb1f0a4cc2151efe5cb4637d23 f9914d104d6b1ff9258b6f00d4860ae4abb7d545 ec2e9c44b7d2deffd15ca9caef48203261a226fb In 20 tries, there were 5 unique ID's, 25% success rate. |
| Arc for MacOS | failed, same ID everytime |
| Mobile iOS Browser | Did this browser pass the test? |
| Safari (default browser) | passed, everytime the ID is unique and "visits count" is 1 tested both normal and incognito tab |
| Chrome | failed, same ID everytime |
| Firefox | failed, same ID everytime |
| Edge | failed, same ID everytime |
| Brave | out of 20 tries, there were 2 unique IDs |
| Opera | failed, same ID everytime |
| Arc | failed, same ID everytime |
| Firefox Focus | failed, same ID everytime |
| Vivaldi | failed, same ID everytime |
| DuckDuckGo | failed, same ID everytime |
| Mobile Android Browser | Did this browser pass the test? |
| Chrome for Android (default browser) | a4c 086 only 2 IDs |
| Firefox for Android | failed, same ID everytime |
| Brave for Android | failed, same ID everytime |
| Edge for Android | failed, same ID everytime |
| DuckDuckGo for Android | failed, same ID everytime |
| Firefox Focus for Android | failed, same ID everytime |
| Opera for Android | failed, same ID everytime |
| Opera Mini for Android | failed, same ID everytime |
| Samsung Internet for Android | failed, same ID everytime |
| Vivaldi for Android | failed, same ID everytime |
| Orions for Android | failed, same ID everytime |
| Ghostery for Android | failed, same ID everytime |
Intro:
- In this guide, I'll show you how I install Windows 11 and customize my experience
Windows 11 Requirements:
- Windows 11 have certain requirements (4gb of ram, 64gb hard drive, TPM, etc) that must be met upon initial setup. If your desktop/laptop doesnt meet these requirements, then the installation will be stopped.
How to check whether your current computer is officially supports Windows 11? (optional step)
What if your current hardware is currently not support by Microsoft to install Windows 11?
1. There are several registry edits that must be done when you're just starting to install Windows 11. Explained here.
2. Alternatively, if you want a solution that works without doing tweaking the registry yourself, do this. First download and run Rufus. Link here. Download the portable version. Just run Rufus, select Windows11.iso, verify your USB thumb drive, and hit 'Start'. This will apply this registry tweak on your behalf, so when you install Windows 11, it will be accepted even on older hardware.
2. Alternatively, if you want a solution that works without doing tweaking the registry yourself, do this. First download and run Rufus. Link here. Download the portable version. Just run Rufus, select Windows11.iso, verify your USB thumb drive, and hit 'Start'. This will apply this registry tweak on your behalf, so when you install Windows 11, it will be accepted even on older hardware.
Don't have a Windows computer, but have a MacOS instead?
Download BalenaEtcher for MacOS and it will create a bootable USB drive. Link here. Keep in mind that you'll need to do the registry tweak I mentioned above with BalenaEtcher.
How to download latest genuine Windows 11 ISO?
1. Go here.
2. Select 'Windows 11 (multi-edition ISO)' and hit 'download'.
3. Select your language, 'English' and hit 'confirm'.
4. Hit '64-bit Download'
5. It will prompt you to save 'Win11_23H2_English_x64v2.iso' to your computer. This is 6.6gb in size. You'll use this for input to Rufus.
2. Select 'Windows 11 (multi-edition ISO)' and hit 'download'.
3. Select your language, 'English' and hit 'confirm'.
4. Hit '64-bit Download'
5. It will prompt you to save 'Win11_23H2_English_x64v2.iso' to your computer. This is 6.6gb in size. You'll use this for input to Rufus.
Create a bootable USB thumb drive:
1. Make sure your USB thumb drive is at least 6.44gb in space, since this is what Windows 11 needs.
2. Once Rufus or BalenaEtcher finishes creating a bootable Windows 11 usb thumb drive, insert this into your computer (laptop/desktop)
3. Restart the computer and press one several keys on the keyboard to get into boot order (DEL, F8, F9, F10, F11, F12). Once there, select usb as 1st priority device.
4. Now Windows 11 installation will begin.
How to disable any 3rd-party applications/shortcuts on your start menu, once Windows 11 boots?
1. There is a trick. At the initial step. where it shows you the language setup, make sure you set the 'Time and currency format' to 'English (World)'

2. If you don't fail to do this step, 3rd-party applications/shortcuts like Spotify, Sudoku, will get installed on your computer's start menu. In which case, you'll need to do a bunch of powershell and/or registry tweaks to get rid of them. That's outside the scope of this post.
2. If you don't fail to do this step, 3rd-party applications/shortcuts like Spotify, Sudoku, will get installed on your computer's start menu. In which case, you'll need to do a bunch of powershell and/or registry tweaks to get rid of them. That's outside the scope of this post.
How to install Windows 11, as a local account, bypassing the use of a "Microsoft account", which links your email to Microsoft?
1. When it asks to 'How would you like to setup this device?', select 'Set up for work or school'
2. When it asks 'Let's set things up for your work or school', select 'sign-in-options'
3. When it asks 'Lett's set things up for your work or school', select 'Domain join instead'.
4. When it asks 'Who's going to use this device?', enter your username (aka C:/users/username)
5. Once completed, Windows 11 boots up without any 3rd-party applications, like this:
Problem #1: How to clear up extra 1GB of RAM?
Explanation:
By default, Microsoft Edge (browser) that comes with Windows is running even in the background, even if you never open it.
Microsoft did this because when you hit the "Edge" icon in your desktop or start menu, Microsoft wants your experience to be as fast as possible.
So when you actually close Edge, eventhough the browser is not visible, the Edge processes are still running in the background.
This is annoying since Edge is using about 1 GB (exactly 0.9 GB when I tested it) without your permission.
Microsoft went to great lengths to stop people from uninstalling Edge for example, they made sure that even disabling registry keys for Edge to start on startup won't fix this problem.
Solution:
There's 2 ways to fix this problem, thereby, freeing up an extra 1gb of ram, everytime Windows 11 starts.
1. Open Edge, go to Settings, then 'System and Performance', then disable these 2 settings 'startup boost' and 'continue running background extensions and apps when Microsoft Edge is closed'.
2. Alternatively, you can edit these registry keys.
Create a tweak.reg file and save the contents
Windows Registry Editor Version 5.00
[HKEY_LOCAL_MACHINE\SOFTWARE\Policies\Microsoft\Edge]
"StartupBoostEnabled"=dword:00000000
[HKEY_LOCAL_MACHINE\SOFTWARE\Policies\Microsoft\Edge]
"BackgroundModeEnabled"=dword:00000000
Problem #2: Since the introduction of Windows 10, and then Windows 11, Windows is tracking your every click, action, on your computer.
Explanation:
Here's a video quick overview.
While Microsoft does give you a few settings to change in "Settings".
If you disable each user-configurable toggle switches, this won't stop 100% of the telemetry data that your computer is sending to Microsoft.
Solution:
The easiest solution I've found is to use a free tool called ShutUp10++. Link here.
I typically run the program, hit 'Actions' drop down menu, and hit 'Apply Only Recommended Settings'. It will ask to restart the computer. Do it.
Problem #3: How to further customize Windows
Windows doesnt allow for much customization, without the user requiring to tweak registry files and/or run powershell scripts.
Solution:
The online community has come to the rescue.
While I don't use these tools. Here's some links
Solution:
The online community has come to the rescue.
While I don't use these tools. Here's some links
| Github Project | Github Link | # of Github stars | Tutorial |
| hellzerg/optimizer |
GitHub - hellzerg/optimizer: The finest Windows OptimizerThe finest Windows Optimizer. Contribute to hellzerg/optimizer development by creating an account on GitHub.
 github.com
| 10.7k | |
| ChrisTitusTech/winutil |
GitHub - ChrisTitusTech/winutil: Chris Titus Tech's Windows Utility - Install Programs, Tweaks, Fixes, and UpdatesChris Titus Tech's Windows Utility - Install Programs, Tweaks, Fixes, and Updates - GitHub - ChrisTitusTech/winutil: Chris Titus Tech's Windows Utility - Install Programs, Tweaks, Fixes, an...
github.com
| 9.5k | |
| Atlas-OS/Atlas |
GitHub - Atlas-OS/Atlas: An open and lightweight modification to Windows, designed to optimize performance, privacy and security.An open and lightweight modification to Windows, designed to optimize performance, privacy and security. - GitHub - Atlas-OS/Atlas: An open and lightweight modification to Windows, designed to ...
github.com
| 9.4k | |
| farag2/Sophia-Script-for-Windows |
GitHub - farag2/Sophia-Script-for-Windows: :zap: The most powerful PowerShell module on GitHub for fine-tuning Windows 10 & Windows 11:zap: The most powerful PowerShell module on GitHub for fine-tuning Windows 10 & Windows 11 - GitHub - farag2/Sophia-Script-for-Windows: :zap: The most powerful PowerShell module on GitHub for ...
github.com
| 6.9k | YouTube |
| Sophia-Community/SophiApp |
GitHub - Sophia-Community/SophiApp: :zap: The most powerful open source tweaker on GitHub for fine-tuning Windows 10 & Windows 11:zap: The most powerful open source tweaker on GitHub for fine-tuning Windows 10 & Windows 11 - GitHub - Sophia-Community/SophiApp: :zap: The most powerful open source tweaker on GitHub for fin...
github.com
| 3.5k | |
| awesome-windows11/windows11 |
GitHub - awesome-windows11/windows11: Windows 11 Settings, Tweaks, ScriptsWindows 11 Settings, Tweaks, Scripts. Contribute to awesome-windows11/windows11 development by creating an account on GitHub.
github.com
| 1.4k | |
| The Windows Club - Ultimate Windows Tweaker 5 |
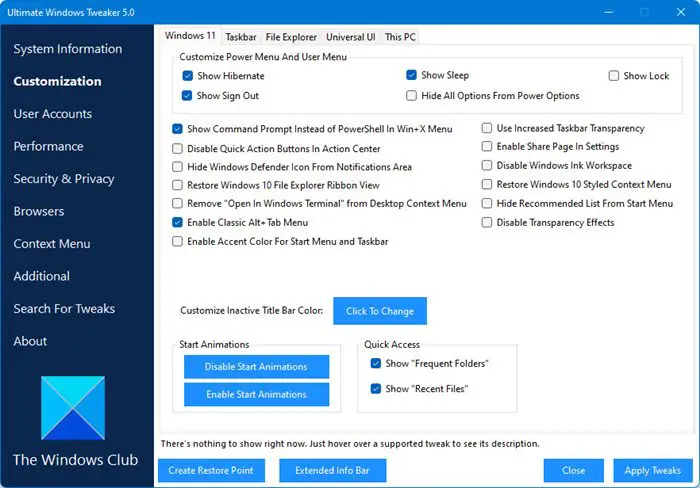
Ultimate Windows Tweaker 5 for Windows 11Download latest version of Ultimate Windows Tweaker 5.1 for Windows 11 - Judged as the best free tweaking software to tweak & customize Windows!
 www.thewindowsclub.com
| n/a | YouTube |
Problem #4: Lack of automatic light or dark mode
By default, Windows comes with either Light or Dark mode. You have to change these manually.
Solution:
Install Github project, Windows Auto Dark Mode. Link here.
Once you run it, make sure to turn on 'Enable automatic theme switching' then set 'from sunset to sunrise (geographic coordinates)'
I recommend this website. Once you in put your city, it shows you latitude and longitude values to copy.
Paste each one into Auto Dark Mode, then Apply Changes.
Now, you can read my 2nd guide on "Automated Light/Dark Mode".
Last edited: