• WANTED: Happy members who like to discuss audio and other topics related to our interest. Desire to learn and share knowledge of science required. There are many reviews of audio hardware and expert members to help answer your questions. Click here to have your audio equipment measured for free!

Directiva r1 speaker build

ctrl

Major Contributor
Forum Donor
Joined
Jan 24, 2020
Messages
1,631
Likes
6,221
Location
.de, DE, DEU
As this is my first DIY there's a lot to be learned :) To some extent it's a litmus test of the Directiva open source for the less initiated, appreciate a lot your patience and guidance.
A few quick notes:

You can also stuff black sealing or foam tape into the spaces between the tweeter and the cutout. Or do the front panel again ;)

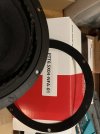
Each driver must be inserted airtight. If there is no sealing/foam tape or similar attached to the driver's rim, do not install it without it.
1649101381924.png

This is probably one of the most common causes of flow noise in loudspeakers.
 

julbo

Member
Joined
Jan 10, 2022
Messages
33
Likes
33
Location
Mediterranean
A few quick notes:

You can also stuff black sealing or foam tape into the spaces between the tweeter and the cutout. Or do the front panel again ;)

Each driver must be inserted airtight. If there is no sealing/foam tape or similar attached to the driver's rim, do not install it without it.
View attachment 197681
This is probably one of the most common causes of flow noise in loudspeakers.
The Purifi driver does have a sealing ring with adhesive, minimalistic though. The PR needs some reinforcement because it is flimsier on the long sides. The tweeter is naked so it’s a miss. I added some sealing foam to the Speakon connector, I can do better sealing the soldered contacts with rtv.
I’ll be doing the front panel again, with a pair of Purifi PRs ;)
I got 2 SB PRs for testing the concept of dual PRs, now I’m without doubt that’s water under the bridge. The plastic chassis is so flimsy that will not seal under the Purifi exertion
Airtight under high SPL, v good lesson. Thank you
 

Attachments

  • image.jpg
    image.jpg
    157.7 KB · Views: 146

wilbur-x

New Member
Joined
Jul 12, 2019
Messages
4
Likes
29
Re. the SB passive radiator: Are there additional weight to the PR in this project ?
 
OP
Rick Sykora

Rick Sykora

Major Contributor
Forum Donor
Joined
Jan 14, 2020
Messages
3,581
Likes
7,232
Location
Stow, Ohio USA
Re. the SB passive radiator: Are there additional weight to the PR in this project ?

No, there was not. Recall it could help, but was concerned over keeping the design simple and reliable in use and during transport.
 
OP
Rick Sykora

Rick Sykora

Major Contributor
Forum Donor
Joined
Jan 14, 2020
Messages
3,581
Likes
7,232
Location
Stow, Ohio USA
After replacing the wood screws with machine screws with nutserts, the improvements were more marginal than I expected. Have not yet tried the passive radiator, but suspect it needs more given its stamped steel frame. Since I have the speaker on my bench, decided to see what I might do to help with the 380 Hz resonance in the driver frame. Purifi mentioned some potential remediation on their part but am using an older woofer and it has the admitted resonance. Since the brace conveniently runs behind the woofer, was able to try many different materials and techniques to improve.

I tried wood bracing, rubber gasketing, sonic barrier and some CLD layering with some of them. Also tried adding a large mass of butyl rubber to the frame (no major effect). As will show, the improvements are incremental and a few dB at best. Even without my latest remediations, you can see the resonance is more than 20 dB lower than the peak contribution by the passive radiator.

First let's start with the simple case of replacing the woofer screws...

1664971328697.png

Green trace is the original screws and purple is with the nutserts. Not the looking as promising as with the SPK5. :eek:

But had the speaker on the bench and so did the same upgrade to the tweeter...

1664971600602.png


While only a slight change, clearly is better (red) than the woofer change alone (purple). Likely the tweeter flange is now vibrating slightly less than before.

Here I tried wedging a couple of layers of 19mm Sonic Barrier between the woofer magnet and the brace...

1664971918009.png


Blue trace is with the Sonic Barrier. While changing the character of the 380 resonance a bit, seems to tradeoff improvement there for worsening around the mid 500 Hz area. Let's try something harder like a wood wedge....

1664972163097.png


So, this (green trace) is just shifting some of the woofer energy from the front baffle to the cabinet brace. Is less impact than I expected. Certainly nothing to motivate me to adopt this change.

So tried wrapping a wood wedge in Sonic Barrier and got the best result so far...
1664972649830.png

If I were to change, this is the one I would make. Still not much but might get better with more surface area as CLD design suggests.

I also tried a more middle of the road approach using layers of vinyl garage door seal and another with a large mass of butyl rubber on the woofer frame. Neither of these showed much promise. I still have yet to do something with improving the passive radiator mount but need to go build an amplifier to test for a customer. More to come after I do some work on r2 too!
 
Last edited:

fluid

Addicted to Fun and Learning
Joined
Apr 19, 2021
Messages
694
Likes
1,198
Rick you seem to be showing the passive radiator output, is there a reason why you aren't looking at the distortion of the Purifi driver to view the effect?
 
OP
Rick Sykora

Rick Sykora

Major Contributor
Forum Donor
Joined
Jan 14, 2020
Messages
3,581
Likes
7,232
Location
Stow, Ohio USA
Rick you seem to be showing the passive radiator output, is there a reason why you aren't looking at the distortion of the Purifi driver to view the effect?

I will eventually, but my bench is not set up with a solid fixture for speaker measurement, so just roughing it for now. My more dependable speaker measurements are done in another room but was torn down and has my son's (rather large) dog there for the weekend. :)

P.S. My SPK and DIrectiva r2 are queued up first for my time btw. So may be a while before I get back to r1.
 
Last edited:
OP
Rick Sykora

Rick Sykora

Major Contributor
Forum Donor
Joined
Jan 14, 2020
Messages
3,581
Likes
7,232
Location
Stow, Ohio USA
@fluid and all, here is a quick look at the apparent difference that the nutserts made to the nearfield 3rd harmonic distortion. One caveat is that these are different woofers, but the result mirrors what was shown in post #105 with the same woofer...

1666199275484.png


This plot is before the nutserts. This one is after...

1666199407847.png


My takeaway is that the tighter coupling of the woofer to the front baffle causes the 380 Hz resonance to be spread out more broadly. So the question is which is more audible?

I have one additional action item here. One other key difference is the screws on the sides of the woofer go into the brace. When I did the nutserts, the front baffle is no longer coupled as tightly to the brace. I should be able to back out those nutserts and put screws under them to restore the brace coupling.
 

abdo123

Master Contributor
Forum Donor
Joined
Nov 15, 2020
Messages
7,439
Likes
7,947
Location
Brussels, Belgium
@fluid and all, here is a quick look at the apparent difference that the nutserts made to the nearfield 3rd harmonic distortion. One caveat is that these are different woofers, but the result mirrors what was shown in post #105 with the same woofer...

View attachment 238101

This plot is before the nutserts. This one is after...

View attachment 238102

My takeaway is that the tighter coupling of the woofer to the front baffle causes the 380 Hz resonance to be spread out more broadly. So the question is which is more audible?

I have one additional action item here. One other key difference is the screws on the sides of the woofer go into the brace. When I did the nutserts, the front baffle is no longer coupled as tightly to the brace. I should be able to back out those nutserts and put screws under them to restore the brace coupling.
These are very weird measurements you have there.
 

fluid

Addicted to Fun and Learning
Joined
Apr 19, 2021
Messages
694
Likes
1,198
@fluid and all, here is a quick look at the apparent difference that the nutserts made to the nearfield 3rd harmonic distortion. One caveat is that these are different woofers, but the result mirrors what was shown in post #105 with the same woofer...

My takeaway is that the tighter coupling of the woofer to the front baffle causes the 380 Hz resonance to be spread out more broadly. So the question is which is more audible?
That is an interesting result Rick, the more compliant mounting doesn't seem to reduce the basket resonance, just make everything around it worse so it doesn't stick out.

Lars from Purifi said this about their mounting tests

"driver mounting:
We did some experiments using a simple birch ply box:
1) screws relatively tight (1-2Nm) is best and there is only a barely detectable HD peak when sweeping at high SPL (100dB or more)

2) less tightening of the screws is just detectably worse (probably insufficient clamping force which causes micro buzzing)

3) clamping the magnet to the box via some damping putty has a beneficial effect. This is an old trick in the industry (KEF etc)

Resonances: all physical objects have resonances (eigenmodes). The question is always which modes get excited and which modes radiate sound. Moreover, a nonlinear mechanism is needed to produce distortion. Anything lose on the baffles or panels may cause distortion (xover components etc). Secure clamping of the driver frame to the box is needed to avoid buzzing.

A stand mount speaker box has its bottom to top standing wave frequency in the same frequency area as the basket/motor resonance. Any air leak can produces a distortion spike at the standing mode frequency. This is a pure air resonance n the box and the leak being nonlinear. Has nothing to do with the driver.

Again, this is all generic for all drivers as determined by the laws of physics.

The conclusion: just tighten the screws well and worry only about all the so many other important aspects of speaker box design "

https://www.diyaudio.com/community/...ifi-woofer-speaker-builds.352063/post-7141689


Seems to concur with your results. As to audibility at levels of 0.05%, this seems a problem for the eyes in a graph rather than ears when listening to it.
 

Jdunk54nl

Addicted to Fun and Learning
Joined
Aug 5, 2020
Messages
969
Likes
1,049
Location
Arizona
@fluid and all, here is a quick look at the apparent difference that the nutserts made to the nearfield 3rd harmonic distortion. One caveat is that these are different woofers, but the result mirrors what was shown in post #105 with the same woofer...

View attachment 238101

This plot is before the nutserts. This one is after...

View attachment 238102

My takeaway is that the tighter coupling of the woofer to the front baffle causes the 380 Hz resonance to be spread out more broadly. So the question is which is more audible?

I have one additional action item here. One other key difference is the screws on the sides of the woofer go into the brace. When I did the nutserts, the front baffle is no longer coupled as tightly to the brace. I should be able to back out those nutserts and put screws under them to restore the brace coupling.
Can we compare the graph scales to each other? If so, it seems that the spike around 380hz is the same level in both graphs, just all the other distortion is also higher in the bottom graph. So you didn't loose anything, just gained more distortion every where else. Again, only if we can actually compare the scales and it does seem like we can from the other parts of the graphs.
 
OP
Rick Sykora

Rick Sykora

Major Contributor
Forum Donor
Joined
Jan 14, 2020
Messages
3,581
Likes
7,232
Location
Stow, Ohio USA
Can we compare the graph scales to each other? If so, it seems that the spike around 380hz is the same level in both graphs, just all the other distortion is also higher in the bottom graph. So you didn't loose anything, just gained more distortion every where else. Again, only if we can actually compare the scales and it does seem like we can from the other parts of the graphs.
Scales are the same. Are you looking for an overlay?
 
OP
Rick Sykora

Rick Sykora

Major Contributor
Forum Donor
Joined
Jan 14, 2020
Messages
3,581
Likes
7,232
Location
Stow, Ohio USA
These are very weird measurements you have there.

I agree! Was really expecting (and hoping for) a clear improvement. Going to put screws back in the sides and retest.
 
OP
Rick Sykora

Rick Sykora

Major Contributor
Forum Donor
Joined
Jan 14, 2020
Messages
3,581
Likes
7,232
Location
Stow, Ohio USA
Here is with the side nutserts replaced by long wood screws into the brace...

1666282001493.png


Is a pretty clear improvement (orange is with wood screws). If you did not know, grey is below the noise level. There is another issue here and this is only around 80 dB. The resonance got much worse at higher levels.

To combine them both will require a special nutsert or some major woodworking. May just wait for the next cabinet am considering building. Am planning to use the baffle supplied by Peter Rawlings and it would be upgraded MDF too. Peter has higher standards than I for MDF. I snuck this work in quick, so may be a bit before I can return here. I hear r2 calling me. :)
 

ayane

Active Member
Forum Donor
Joined
Dec 15, 2018
Messages
183
Likes
686
Location
NorCal
Yep, that's quite a dramatic result. Looks like it was the right call to screw the woofer to the brace!
 
OP
Rick Sykora

Rick Sykora

Major Contributor
Forum Donor
Joined
Jan 14, 2020
Messages
3,581
Likes
7,232
Location
Stow, Ohio USA
Yep, that's quite a dramatic result. Looks like it was the right call to screw the woofer to the brace!
Maybe even a better one to drill further into the brace and install nutserts. Will just need some longer bolts to try. Off to shop for some...
 
Last edited:
OP
Rick Sykora

Rick Sykora

Major Contributor
Forum Donor
Joined
Jan 14, 2020
Messages
3,581
Likes
7,232
Location
Stow, Ohio USA
...the longer bolts arrived a few days ago and drilled out the holes and added the nutserts. Unfortunately, after tightening, the bolts would not torque as tightly as in the other holes or the wood screws. After trying a few different glues including epoxy, it appears the holes are slightly too big for the nutserts and the glue is insufficient to compensate. Have drilled clean holes and am gluing some dowels in. Will resort back to the wood screws.
 
Last edited:

garps49

New Member
Joined
Dec 4, 2022
Messages
2
Likes
2
See Amir's review here!

Here is BOM...

View attachment 157521


So this is a build of the Directiva r1 speaker. I have not give much thought to a good naming scheme, so am calling it r1 for now. It is based on a Denovo cabinet sold by Parts Express (and others).

https://www.parts-express.com/Knock-Down-MDF-0.56-ft-Bookshelf-Cabinet-300-7064

View attachment 130681

If you have worked with these flat packs before, you might have expected the back the be rabbeted, but in this case it is the sides. While clearly more milling is involved, this approach yields only one joint on each side and so offers a more even paint surface.

The back is in the bottom right and the front baffle is on the bottom left in the pic above. We will start with the front... (see next post)

P.S. (EDIT)

While using wood screws has not been an issue (as far as I know), in any of my earlier DIY speaker build for ASR, my rebuild of the Purifi SPK5s, brought some light to some ugly resonances that were apparently caused by wood scews rather than machine screws and nutserts or equiv. All of my subwoofers have used t-nuts, so given the excursion of the Purufi woofer used in r1, highly recommend using better fasteners to mount the woofer (and likely the tweeter too). As soon as I can do so with my r1 prototype, will retrofit and supply some measurements to illustrate the difference.
 

garps49

New Member
Joined
Dec 4, 2022
Messages
2
Likes
2
I've just joined here but have been building and listening for over 60 years. Yeah, I'm THAT old, dammit. Here's a process that I was taught a long time ago - use AT LEAST 1 1/2 inch wood screws every two inches and first, use a GOOD wood glue so it's glued and screwed, no resonance that I've ever heard. While it's available here in the States, I'm from Canada and always use WELDBOND. It's the best. I even use it when doing concrete repairs and never had a problem with cracks around the repair. Hope it works for you. BTW, WELDBOND is available on Amazon.
 

carbidetooth

Member
Joined
Sep 3, 2020
Messages
63
Likes
101
Location
Boise, ID
I've just joined here but have been building and listening for over 60 years. Yeah, I'm THAT old, dammit. Here's a process that I was taught a long time ago - use AT LEAST 1 1/2 inch wood screws every two inches and first, use a GOOD wood glue so it's glued and screwed, no resonance that I've ever heard. While it's available here in the States, I'm from Canada and always use WELDBOND. It's the best. I even use it when doing concrete repairs and never had a problem with cracks around the repair. Hope it works for you. BTW, WELDBOND is available on Amazon.
I gather Rick is speaking to driver mounting as opposed to cabinet construction.
Audible resonance would most likely be from the material used to build cabinet or lack of panel bracing, not the joinery. With simple, tight joinery techniques and almost any PVA wood glue, the weak link will be the material itself. Despite advertising claims and internet lore, bonding that even slightly exceeds the strength of the material it's gluing together is more than adequate. Beyond that, it's simply has no benefits. While mechanical fasteners such as screws may provide clamping pressure while glue dries or cures, I question their necessity in speaker enclosures. If one intends any subsequent machining, they become a liability.
 
Top Bottom