• WANTED: Happy members who like to discuss audio and other topics related to our interest. Desire to learn and share knowledge of science required. There are many reviews of audio hardware and expert members to help answer your questions. Click here to have your audio equipment measured for free!

Building a wireless remote volume control with a rotary knob for Raspberry pi - help needed with Python

MCH

Major Contributor
Joined
Apr 10, 2021
Messages
2,642
Likes
2,252
Hello team,

I have been exploring the possibility to diy a remote volume control in the form of a volume knob for some time. Unfortunately such a thing is relatively rare, and the ones that exist don't really fit my system.
Not surprisingly, I am not the only one interested, and there is even a thread in ASR dedicated to it, from where i took a lot of inspiration and ideas:


If you read the thread, you will realize soon what is the main issue and the probable reason why something that seems so simple does not exist: Every system is different and has different needs. Some need an IR remote, some need Bluetooth, some would need wifi...

The core of my system is a Raspberry Pi running Camilladsp built following @mdsimon2 tutorial so it is quite flexible and could receive almost any sort of signal out of the box or with the necessary receivers.
I can imagine the same or similar solution will work with other pi based streamers but to be honest, I don't know.

This project is my first contact with all the protocols that i am going to mention in this thread. It is not that i am not an expert, I am an absolute newbie and i have no idea about Linux, let alone programming any language. This thread is more about questions and asking for help than about providing solutions from my side. However i also hope that it triggers the interest of others, so the parts that I believe I have sorted out, i will try to explain them as a sort of unfinished tutorial.

The rationale:

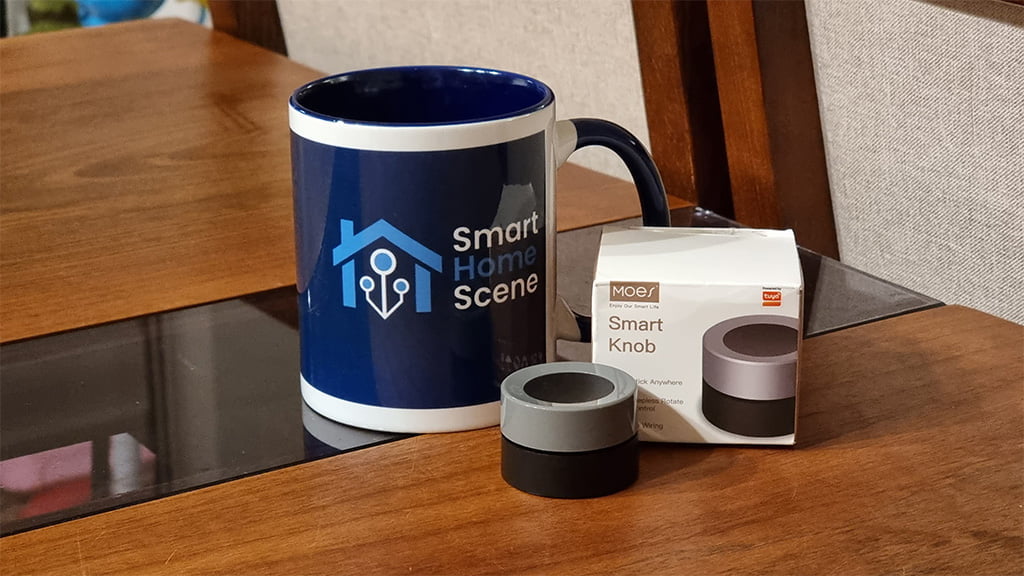
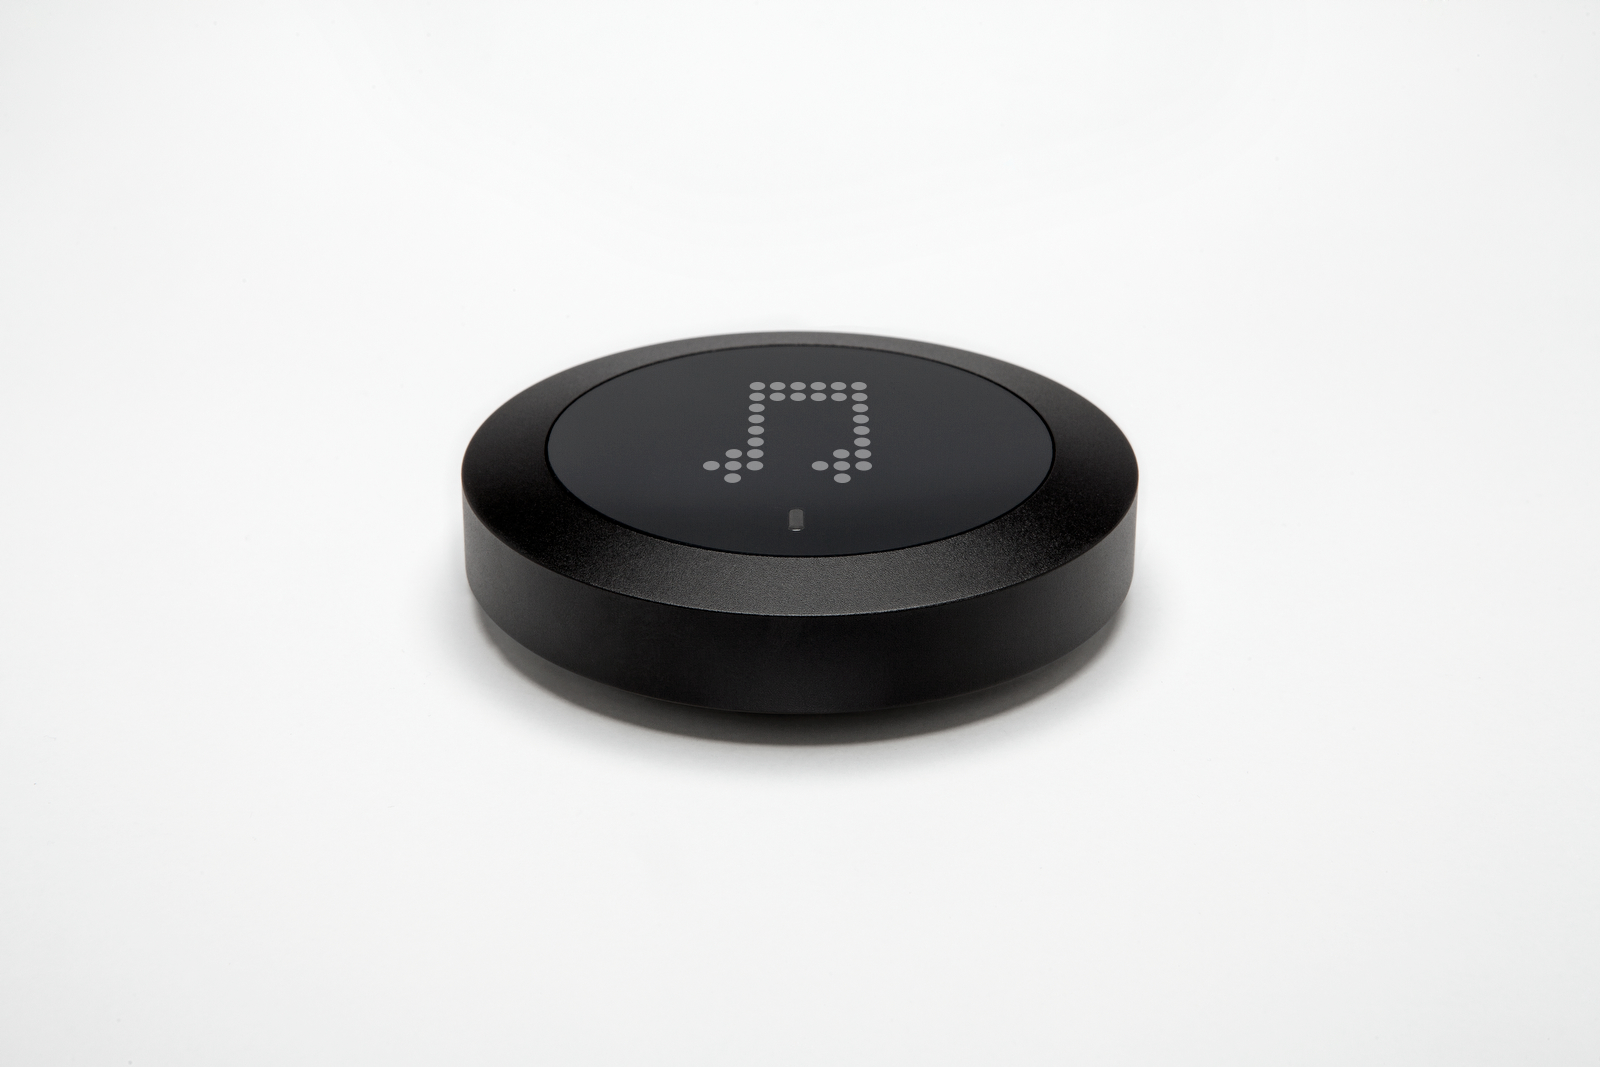
After researching a bit i have decided to go for ZigBee. This is a sort of low energy Bluetooth that the smart bulbs and switches, like the Philips Hue and Ikea stuff, in between many others, use. The reasons to go for Zigbee are the following:

- There are plenty of ready made devices easy to find and relatively cheap. From Aliexpress to nice finished Philips knobs. No dyi, no soldering, no 3D printing and no diy PCB necessary.
- Low energy consumption: the knobs available work with batteries that last long. Maybe not as long as the usual IR remote but not as short as an Arduino board with a LiPo cell attached that you need to charge every few days.
- There is a large and active community behind (Home Assistant, etc.).

The way that i think this could work is the following:

Zigbee rotary knob ---zigbee signal---> zigbee2mqtt zigbee to mqtt bridge ---mqtt---> Mosquitto mqtt broker ---mqtt---> Eclipse Paho mqtt Python Client ---python---> Pycamilladsp python library <------> Camilladsp

I believe i am mostly done until Python, but i could do with some help. If you think you can have a look and make some suggestions, feel free to go to post 3 and help me out, thanks for reading :)
 
Last edited:
OP
M

MCH

Major Contributor
Joined
Apr 10, 2021
Messages
2,642
Likes
2,252
The hardware and set up of mqtt.

The hardware is not complex:

- Zigbee rotary knob from Aliexpress (14 euros shipped from China). You can also find it in Amazon for a few euros more. This is the exact one I ordered:


I had read very positive reviews of the knob, but when i received it, to be honest, it was a bit of a deception. It doesnt't feel very sturdy or luxurious and is smaller than i thought. It seems built well enough, and the bottom part, that will be subject to more stress, specially if you fix it to a surface, is metallic and looks strong enough. It comes with a metallic base that you can fix somewhere and the knob attaches to it with magnets. You need to buy the battery separately but they are very cheap. Inside it looks much better though, you can find a teardown and more details here:


IMG_20221224_094212.jpg

The tuya knob besides the lavish, and much bigger, Microsoft Surface Dial.

All taken into account, i believe this is a very good option for a proof of concept. If I make it work well and i like the result, i might invest in a big good Philips knob. And if not, well, i lost a total of 20 euros in the project... This is the beauty of the ZigBee option, there are many options with different finishes and prices, and they continue releasing them, the last Philips knob was released just a couple of months ago.

- Zigbee CC2531 Sniffer. This is a USB dongle that captures the Zigbee signals. I highly recommend to buy the cable shown below to connect to the pins to flash it. The pins are very small and the cable/connector allows you to plug standard dupont connectors the same size than the raspberry pi gpio. They sell these dongles without firmware for 4-5 and for 10-15 euros they also come with firmware preinstalled (in this case you will not need the cable). I decided to go for a blank one because from what i read in reviews in Amazon and Ali, quite often the expected firmware is not there or it is not the correct one. To flash the firmware is very easy and at least you have the control of what you are doing.
The exact dongle (5 euros, with antenna) and cable (1.13 euros) i bought are these:


Note that the guys at Home Assistant do not recommend these dongles but the more modern (and much more expensive ones). However, the reasons for that are not really relevant for me. Iirc they say:
1. It is based on an old chip - well i am also old
2. It can't control more than 20 devices
3. The signal range is short - 3-4 meters will do for me. Let's see if it achieves that.
On the positive side, it is very well supported and documented, and this can be very valuable for a newbie.

1st step: Flash the CC2531 dongle:

There are different ways of doing this, but if you have a raspberry pi, you don't need to buy any additional hardware (but the cables) and it is very easy to do.
You can find the official instructions here:


And a video that follows step by step the official instructions:


When i tried to do the flashing process in my ubuntu camilladsp setup, for some reason it did not work, at the point that the instructions ask you to check that the cc2531 is connected and recognized, it did not work, so i prepared a fresh new sd card with raspberry pi OS (32 bit) and did the flash using that. If you have the same problem, you can contact me and i can explain you in more detail what i did.

The only thing i found a bit confusing of the instructions was the pinout of the dongle, that is not clearly explained and the numbers in the board are so small that are difficult to see. Here a picture i found somewhere else:

1671840334465.png


This is how my assembly looked like:

IMG20221223173820.jpg


Note that I have only 4 cables connected and most tutorials show 5. The 5th is for power and it is not necessary if you plug the dongle to a USB socket like shown in the picture. If you are using a raspberry pi zero for the flashing and you don't have an adaptor handy, you can use the 5th cable option and leave the USB unplugged.

Once you are done, you can disconnect the cables and use the dongle as a simple USB dongle.

2nd step: install mosquitto mqtt broker.

This, as the name indicates, is a piece of software that receives information from one or several mqtt clients, and distributes the information to other mqtt clients that are subscribed to receiving that information. In our case, it is going to receive the information from zigbee2mqtt client (next step) and send it to paho mqtt (post #3).

These instructions are very good and clear.


At the end of the tutorial it suggests to install the mosquitto mqtt client. This is not necessary for our project, because we are going to use paho mqtt as client (post #3).

3rd step: install zigbee2mqtt bridge.

This is a piece of software that receives information from the mqtt dongle and transfers it to our mqtt broker that we have just installed.

Here you can find a tutorial. However this one is not as good as the previous one if you are a complete noob like me.


Some difficulties i found and tricks:

- When i input "npm --version" to check that npm was installed, it was not, and i needed to do it with:
sudo apt install npm

- When it asks to set an owner for the folder, the correct way to do it is:
sudo chown -R yourusername: /opt/zigbee2mqtt

- When it tells you to Create a systemctl configuration file for Zigbee2MQTT with:
sudo nano /etc/systemd/system/zigbee2mqtt.service
The tutorial does not mention it, but notice that in the line 14 of the, when it says "User=pi" you need to change "pi" for "yourusername"

Once you are done with this, you can press the reset/pair button on the bottom of your knob for 6 seconds, until a green led lights up, and the knob will pair automatically to the dongle and if you turn it you will start to see the first data the raspberry captures:

1671840495498.png


What i did there is to rotate right two times, then rotate left, then pressed once, and then pressed twice. You can see all these actions after "action". You can see as well that every time the knob sends a piece of information, it is accompained by the battery left, quality of the wireless connection, etc. This can be useful if you plan to build a display and want to add this information. Too much for me for now...

The device has two operation modes, "event" and "command", and it sends different information and responds to different actions in each mode. The capture above shows that at the time it was operating in "event" mode. In this mode the actions are simply "rotate right" "rotate left" "single press" "double press" etc. without assigning any value to the actions. This means that it doesn't matter if you rotate the know a lot or a little, it just informs that you have rotated the knob. This does not seem very helpful for a volume control. If you rotate very slowly it publishes various actions, so it could work, but i believe the other mode is more convenient:
If you press the button three times fast, it switches modes, in this case, from "event" to "command". Now, pressing the button is called "toggle" and the double press does not exist. But now, when you turn the know, it gives a value based on how much you turn it, it calls it "action_step_size":

1671840576139.png


This looks much better to be used as a volume knob. Additionally, if you turn the knob continuously, like you would do with the volume control of a real amp, it publishes low values continuously, and this can be used to make it work like a real volume knob would. As you can see, the values are relatively high numbers, the minimum value i get, turning the knob very slowly and just one click, is 13, so i think these values should not be translated directly to db. As the values seem sort of fixed (13, 25, 37,...), something like this could work well:
if 10 < "action_step_size" < 20 -> +1 db volume (as mentioned, a very small turn value is 13
if 20 < "action_step_size" < 30 -> +2 db volume
if 30 < "action_step_size" < 40 -> +3 db volume
and so on.
 
Last edited:
OP
M

MCH

Major Contributor
Joined
Apr 10, 2021
Messages
2,642
Likes
2,252
Python and Camilladsp

Now we need to somehow make that camilladsp receives this data from the knob, and i believe that one way to do it is via paho-mqtt, that is a mqtt client that can subscribe to the notifications that the mqtt broker (mosquitto, installed in the previous step) receives from the knob. And this information can be used in Python.


And here guys is when I think I could do with some help...

Currently I use the python program that @mdsimon2 wrote for camilladsp together with a flirc IR remote, and it works perfectly:


I need and want to keep on using this, but i would like to add to the necessary lines so that it responds to the events of the knob, but i have no idea how to do it, not even where to start. Any suggestions or ideas are welcome....

Here is an example from the link above. I think i can more or less get the logic of it, but i am far far away from being able to adapt it to what i need to do.... :-/

1671879643309.png

again, thanks for reading and any suggestions or comments are very much appreciated.
 
Last edited:

ppataki

Major Contributor
Joined
Aug 7, 2019
Messages
1,241
Likes
1,385
Location
Budapest
Really no pun intended with this question but why not just simply use the volume buttons on your keyboard?
I don't use a Pi but I guess a wireless keyboard would just work fine with it too

Merry Christmas!
 

simbloke

Senior Member
Forum Donor
Joined
May 30, 2019
Messages
355
Likes
585
Location
North Wales, UK
I've got a fair bit of ZigBee stuff around the house, and it mostly works.
No way I'm putting my speakers under the control of stuff that just mostly works! Good luck though...
 
OP
M

MCH

Major Contributor
Joined
Apr 10, 2021
Messages
2,642
Likes
2,252
Really no pun intended with this question but why not just simply use the volume buttons on your keyboard?
I don't use a Pi but I guess a wireless keyboard would just work fine with it too

Merry Christmas!
Hey Pataki, mine is a living room setup, i don't use nor want to have any keyboard with me. I already have a working ir remote, but this project is intended to go a bit beyond and have volume control without the need to point the remote to the receiver and finding the button (read at night). Yes, definitely a first world problem but a nice project for the winter to entertain myself and learn a bit.
But I agree with you, it would be a bit ridiculous for a desktop setup :D
Merry Xmas to you!!
 
OP
M

MCH

Major Contributor
Joined
Apr 10, 2021
Messages
2,642
Likes
2,252
I've got a fair bit of ZigBee stuff around the house, and it mostly works.
No way I'm putting my speakers under the control of stuff that just mostly works! Good luck though...
That is a fair point, but one easy to solve. I already have a volume limit in place that cannot be changed other than in the terminal (drunk proof) and for the knob specifically i plan to make it work only between certain volume limits. The intention was to avoid the kids being playing with it and having a surprise when starting the music, but that would cover device malfunctioning as well. Thanks for the heads up!
 
Last edited:

ppataki

Major Contributor
Joined
Aug 7, 2019
Messages
1,241
Likes
1,385
Location
Budapest
Hey Pataki, mine is a living room setup, i don't use nor want to have any keyboard with me. I already have a working ir remote, but this project is intended to go a bit beyond and have volume control without the need to point the remote to the receiver and finding the button (read at night). Yes, definitely a first world problem but a nice project for the winter to entertain myself and learn a bit.
But I agree with you, it would be a bit ridiculous for a desktop setup :D
Merry Xmas to you!!
Have fun with it! :)
 

Daverz

Major Contributor
Joined
Mar 17, 2019
Messages
1,309
Likes
1,475
I'm missing something here: how do you know what level the Dial is set at?
 
OP
M

MCH

Major Contributor
Joined
Apr 10, 2021
Messages
2,642
Likes
2,252
I'm missing something here: how do you know what level the Dial is set at?
Hi @Daverz , the knob only communicates changes, does not have an absolute level itself. This way of working is actually much better for our purpose. Think of a normal remote control, it tells your amp "volume up by xx" or "volume down by yy", but the remote itself does not know the actual volume level nor has a level itself.

What could be done, if the knob has a display, is to send back from the system to the knob the actual volume value so that the knob can show it in its display.

An example of such knob is the Nuimo Controller (Bluetooth low energy). Member @DrCWO developed a solution based on it, but only works with Roon. Additionally, i believe the Nuimos are not produced anymore and are expensive and difficult to find used, even in Germany.


Daverz

Major Contributor
Joined
Mar 17, 2019
Messages
1,309
Likes
1,475
Hi @Daverz , the knob only communicates changes, does not have an absolute level itself. This way of working is actually much better for our purpose. Think of a normal remote control, it tells your amp "volume up by xx" or "volume down by yy", but the remote itself does not know the actual volume level nor has a level itself.

What could be done, if the knob has a display, is to send back from the system to the knob the actual volume value so that the knob can show it in its display.

An example of such knob is the Nuimo Controller (Bluetooth low energy). Member @DrCWO developed a solution based on it, but only works with Roon. Additionally, i believe the Nuimos are not produced anymore and are expensive and difficult to find used, even in Germany.


I think the most important thing is to know the current CamillaDSP volume level before you turn on the amp and hit play.

My current DIY RPI4 solution is a FLIRC infrared receiver USB dongle, an old Harmony remote, a 7" HDMI LCD display, and a custom Python script to control it all. It works very well so far. DAC is a Motu M4.

The LCD display is overkill if you just want a simple volume display. I think a fixed character display would probably be much easier to program for just volume. And any old surplus IR remote with volume up/down will probably do.

My original ambition was to create something like a digital pre-amp. Currently I just have volume/mute, input switching (USB or analog input), and the ability to step through my CamillaDSP configs.
 
OP
M

MCH

Major Contributor
Joined
Apr 10, 2021
Messages
2,642
Likes
2,252
I think the most important thing is to know the current CamillaDSP volume level before you turn on the amp and hit play.

My current DIY RPI4 solution is a FLIRC infrared receiver USB dongle, an old Harmony remote, a 7" HDMI LCD display, and a custom Python script to control it all. It works very well so far. DAC is a Motu M4.

The LCD display is overkill if you just want a simple volume display. I think a fixed character display would probably be much easier to program for just volume. And any old surplus IR remote with volume up/down will probably do.

My original ambition was to create something like a digital pre-amp. Currently I just have volume/mute, input switching (USB or analog input), and the ability to step through my CamillaDSP configs.
Ah yes of course, sorry i missundertood you.
I agree with you that having a display to show the volume is very important. I do have a display for that purpose too. I built it following the instructions in the camilladsp tutorial. It only lights up when you do any change or when camilladsp starts running. This is it (it is an OLED display that i fixed behind a 50% transparency grey methacrylate panel):

1672047037827.png

I really like this solution because it allows me to hide all the electronics in a cabinet. The display is the only thing you can see under the tv.
It indicates volume, source, sample rate and status of Camilladsp.
I also have a flirc and a regular IR remote now, the rotary knob is meant to work in addition to that.
If I get the rotary knob working the volume will be shown in the display as it does now when I use the ir/flirc remote.

You can find very detailed instructions and python documents for both display and flirc remote in the link below, if you are curious about it:

 
OP
M

MCH

Major Contributor
Joined
Apr 10, 2021
Messages
2,642
Likes
2,252
Btw @Daverz you mention you use a custom python script for your remote. Did you write it yourself? Can you program in Python?
What is your opinion on what i aim to do with paho-mqtt and pyCamillaDSP? Feasible, difficult, impossible...? Thanks!
 

Daverz

Major Contributor
Joined
Mar 17, 2019
Messages
1,309
Likes
1,475
Btw @Daverz you mention you use a custom python script for your remote. Did you write it yourself? Can you program in Python?
What is your opinion on what i aim to do with paho-mqtt and pyCamillaDSP? Feasible, difficult, impossible...? Thanks!

Yes, it's a script I wrote. Your project looks feasible from a cursory look. Have you been able to get that example script to run and process events for your Dial? Then you just need to use the CamillaDSP API to change the volume in your on_message() callback.

Python:
from camilladsp import CamillaConnection


HOST, PORT = "127.0.0.1", 31234
cdsp = CamillaConnection(HOST, PORT)
cdsp.connect()

# ...

def on_message(client, userdata, msg):
    current_volume = cdsp.get_volume()
    # extract the 'action_step_size' and convert to db_change
    new_volume = current_volume + db_change
    if new_volume > 0:
        new_volume = 0
    elif new_volume < -99:
        new_volume = -99
    cdsp.set_volume(new_volume)
 
Last edited:
  • Like
Reactions: MCH
OP
M

MCH

Major Contributor
Joined
Apr 10, 2021
Messages
2,642
Likes
2,252
Yes, it's a script I wrote. Your project looks feasible from a cursory look. Have you been able to get that example script to run and process events for your Dial? Then you just need to use the CamillaDSP API to change the volume in your on_message() callback.

Python:
from camilladsp import CamillaConnection


HOST, PORT = "127.0.0.1", 31234
cdsp = CamillaConnection(HOST, PORT)
cdsp.connect()

# ...

def on_message(client, userdata, msg):
    current_volume = cdsp.get_volume()
    # extract the 'action_step_size' and convert to db_change
    new_volume = current_volume + db_change
    if new_volume > 0:
        new_volume = 0
    elif new_volume < -99:
        new_volume = -99
    cdsp.set_volume(new_volume)
hi Daverz,
Thanks a lot for your help. I think that little by little i am getting there. Your example script will be very useful, however right now i am stuck on how to extract the action and action_step_size from the payload of the message, as the payload contains several fields. This is an example of how it looks like:

Dec 23 23:22:02 ubuntu npm[8358]: Zigbee2MQTT:info 2022-12-23 23:22:02: MQTT publish: topic 'zigbee2mqtt/0xdc8e95fffe8a7094', payload '{"action":"brightness_step_down","action_step_size":13,"action_transition_time":0.01,"battery":100,"linkquality":102,"operation_mode":"command","voltage":3000}'

I will need to extract the action ("brightness_step_down" or "brightness_step_up") as one will mean "volume up" and the other "volume down". As the "action_step_size" is always a positive value, extracting only this value will not be enough, i will need to give the resulting db a negative value if the action is "brightness_step_down". But the question for now is, how can i extract those fields from the payload? Sorry for my complete ignorance :)
 
Last edited:

Daverz

Major Contributor
Joined
Mar 17, 2019
Messages
1,309
Likes
1,475
hi Daverz,
Thanks a lot for your help. I think that little by little i am getting there. Your example script will be very useful, however right now i am stuck on how to extract the action and action_step_size from the payload of the message, as the payload contains several fields. This is an example of how it looks like:

Dec 23 23:22:02 ubuntu npm[8358]: Zigbee2MQTT:info 2022-12-23 23:22:02: MQTT publish: topic 'zigbee2mqtt/0xdc8e95fffe8a7094', payload '{"action":"brightness_step_down","action_step_size":13,"action_transition_time":0.01,"battery":100,"linkquality":102,"operation_mode":"command","voltage":3000}'

I will need to extract the action ("brightness_step_down" or "brightness_step_up") as one will mean "volume up" and the other "volume down". As the "action_step_size" is always a positive value, extracting only this value will not be enough, i will need to give the resulting db a negative value if the action is "brightness_step_down". But the question for now is, how can i extract those fields from the payload? Sorry for my complete ignorance :)

Were you able to get that oiginal paho script to run? The payload above looks like JSON, but the paho Python module may convert it to a Python dictionary. To get a better handle on what it is, you can add some more print statements to the callback:

Python:
print('payload type:', type(msg.payload))
print('payload attributes:', dir(msg.payload))

If it's a string, you can convert it using the built-in json module

Python:
import json

# ...

payload = json.loads(msg.payload)  # if it's a string and not already converted to a dict for you
step_size = payload['action_step_size']
# convert step_size to dB based, this would be your own function
db_change = step_size_to_db(current_volume, step_size)
if msg.action == 'brightness_step_down':
     db_change = -db_change
# ...
 
  • Like
Reactions: MCH
OP
M

MCH

Major Contributor
Joined
Apr 10, 2021
Messages
2,642
Likes
2,252
Were you able to get that oiginal paho script to run?
Yes, but I modified it to subscribe to my event "zigbee2mqtt/0xdc8e95fffe8a7094". I thought it is not necessary for me to subscribe to the SYS topics, but I might be wrong....
I am not at home now to paste the exact document but basically i made:
Broker=IP of the pi
Client.subscribe(zigbee2mqtt/0xdc8e95fffe8a7094)
Something like that
The payload above looks like JSON, but the paho Python module may convert it to a Python dictionary. To get a better handle on what it is, you can add some more print statements to the callback:
I am out until Sunday, but I will try this and follow your suggestions and report back if you are still around. Thanks a lot for that! When I googled how to extract the information from the payload I got millions of answers i could not understand so I was completely lost....
 

Daverz

Major Contributor
Joined
Mar 17, 2019
Messages
1,309
Likes
1,475
Yes, but I modified it to subscribe to my event "zigbee2mqtt/0xdc8e95fffe8a7094". I thought it is not necessary for me to subscribe to the SYS topics, but I might be wrong....
I am not at home now to paste the exact document but basically i made:
Broker=IP of the pi
Client.subscribe(zigbee2mqtt/0xdc8e95fffe8a7094)
Something like that

I am out until Sunday, but I will try this and follow your suggestions and report back if you are still around. Thanks a lot for that! When I googled how to extract the information from the payload I got millions of answers i could not understand so I was completely lost....

Here's a youtube video:


He shows msg.payload as a JSON string, so you convert it to a python object with json.loads().
 
  • Like
Reactions: MCH
OP
M

MCH

Major Contributor
Joined
Apr 10, 2021
Messages
2,642
Likes
2,252
Here's a youtube video:


He shows msg.payload as a JSON string, so you convert it to a python object with json.loads().
Great, thanks Daverz!!
 
OP
M

MCH

Major Contributor
Joined
Apr 10, 2021
Messages
2,642
Likes
2,252
in the meantime, i have found the paho mqtt tutorial below that is quite complete and starts from the very beginning. Now everything starts to make sense, even though it uses some terminology that is definitely not for a newcomer like me.


one doubt i have: i read pycamilladsp is a websocket client. Does this mean that paho-mqtt client should also be set up as websocket or should it be left as tcp?
 
Last edited:
Top Bottom