• Welcome to ASR. There are many reviews of audio hardware and expert members to help answer your questions. Click here to have your audio equipment measured for free!

A 3D Printable Grille for the KEF LS60

kemmler3D

Master Contributor
Forum Donor
Joined
Aug 25, 2022
Messages
8,770
Likes
19,116
Location
San Francisco
Another username-fulfillment post: I had a kid last year, and she is now more than capable of reaching the drivers on my LS60s and damaging them and/or hurting herself in the process. Unable to move the speakers somewhere safe and unwilling to sell them for something else, I decided to make grilles.

After more than a normal number of failures, I've come up with something that seems functional and looks the way I envisioned from the start... my goal was to make something that befit the clean lines of the speaker:

PXL_20261002_155457010.jpg


At almost 30 hours per print and 1KG of filament per side, they are not trivial, but all you need to make a set of these is a printer, 2KG of filament, some glue (to assemble the frame), and some stretchy speaker fabric. I think if I achieved anything in this design, it was coming up with a track and little clips to hold the fabric in place really effectively, no glue or other fasteners required.

I don't think the grilles add to the look of the speaker, (they are intentionally featureless) the design is not really optimized in any sense (could use less plastic), the geometry of the 3D files is not clean by any means, they probably impair the sound quality a little, and they don't look so great from the back. But I am not aware of any alternatives, either. So:

If you need grilles for either "design committee" approval or to protect them from kids with a hands-on approach, see below for downloads and instructions on how to build these for yourself.
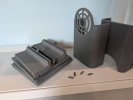
 
Update 10/7: Added the clip pusher tool, tweaked the support blocker, rewrote instructions with more photos:

Link is the 3MF file to print one yourself. It's 10 parts on one plate, plus a second plate for all the little fasteners / dowels / clip pusher.


Before starting, you will need:

  • A quantity of stretchy speaker fabric of roughly 0.4mm thickness large enough to more than cover the outside of the frame.
  • Glue for bonding the printed parts. I just used regular CA (super) glue from the hardware store, but you can find all sorts of recommendations out there.
  • Scissors for cutting fabric
  • A small knife (utility / exacto) for cutting the hook holes.
  • Elastic bands for holding the grilles onto the speaker.

  1. Print both plates in the 3MF and gather all the parts. Then repeat for the second grille. (~60h total) I recommend 2 walls, 7-9% infill, ORGANIC TREE SUPPORTS ONLY and make sure to use the support blocker mesh to avoid filling the dowel holes with support material. Those can print fine without support.

    Overall I've found this to be a demanding print and have had a good handful of failures. Print with fresh spools of filament and a well-calibrated machine. Of the filaments I tried for this project, Sunlu PLA 2.0+ worked the best. You can print it with one full spool (twice) but as you can see from the pics it's not a disaster if you have to change spools during a print.

    Unfortunately the supports really are necessary, I couldn't figure out another way to orient the fabric clip tracks so that fabric, and not plastic, would be in contact with the speaker. I thought this was better for protecting the finish of the speaker, but the downside is you need supports to print the pieces in an upright position, one way or another.

  2. Assembly:

    Dry fit:
    You should put it together without glue first to make sure you've got the parts in the right order, nothing missing, etc.

    1791423661214.png


    Tops and bottoms: You can probably do it the other way, but I felt like this was more natural. Glue all tops and bottom halves together first. You need to do it this way because of the dowels, you can't fit a piece vertically and horizontally at the same time.

    Apply glue to each dowel before inserting it into the bottom piece. Add a drop of glue to each dowel and a trace of glue along the groove on top of the bottom piece. Then fit the top piece to the bottom piece. Clamps aren't really necessary, but might help. Just hold them together for about 15 seconds to make sure they're bonded, and put it aside.

    1791427482429.png
    1791427498799.png

    1791427527252.png


    Finishing the glue-up:
    Put the front face of the grille face down on your work surface and attach the sides and the back respectively. Give it a good amount of time, ideally overnight, for the glue to cure, otherwise you'll end up with residue on the cloth.

    1791427715087.png
    1791427727391.png
    1791427739948.png
    1791427752311.png
  3. Attaching the fabric
    Drape the fabric over the grille frame and cut a piece that covers the entire frame with ~2" ~5cm to spare on each side.
    1791427931343.png

    Start with the back corners and get the fabric well-stretched around the frame. Start with both corners on one side, then do the other side, trying to put a suitable stretch into the fabric from the beginning. Pull the fabric tight around the edge and push a clip into the track. The clip will angle away from the edge, "downward", and the wide end hooks inward, away from the edge. You can start pushing it in with your thumb and once it's partially inserted, use the clip pusher to get it the rest of the way.


    1791428038181.png
    1791428080113.png
    1791428124480.png

    Attaching the edges:
    You should have the fabric looking smooth around the surface of the frame, but mostly hanging loosely at the edges. Using the clip pusher, work from edge to edge, starting with one or two clips per edge and adding as many as needed. It's a bit tricky to insert the clips, but a technique that started working for me was to get stretch the fabric, then push the clip into the track, get the clip partially seated (think halfway in) so that it didn't fall out, just using my thumb, then finish pushing it in with the clip pusher. It will click or as least 'thunk' into place when the clip is properly seated.

    The clips go in somewhat at an angle, facing "down" away from the edge, and the clip pusher mostly just goes straight in, almost parallel with the edge surface, as shown.

    If you are unhappy with how a clip is set, you can remove it by pulling hard on the fabric on either side (across, not side to side) of the clip. The clip will pop out suddenly and go flying around the room, so try to cover it with your hand as you pull. Or ideally, just don't place any clips wrong.

    As you get the edges tighter and looking crisp, look around the edges for any spots where the fabric is loose or lifts up, and just pop in a clip there. Once you get to 6-or-so clips per side, it should be looking pretty crisp.

    You will probably want to use the narrow / small clips on the actual corners to get them looking nice. Two MIGHT be necessary per corner but I was able to do it with one each.

    1791428176432.png
    1791428226479.png
    1791428510986.png
    1791428554292.png

    1791428649543.png

    Let out the hooks: You may be wondering as you go around the edges... do I just leave the fabric on the hooks? Answer: At first yes, try to get the fabric really tight around the hooks. Later, cut a tiny hole and use the hook to enlarge it and reveal the hooks without tearing the fabric more than necessary.

    Once you get the hooks through the fabric, you may find the clips nearest the hooks need to be removed and re-set.

    1791429376346.png
    1791429387935.png


    Trim the fabric: Once you're happy with how all the corners and edges look, you can trim the excess fabric. Once you trim the fabric it's harder to remove or set clips, so try to be sure before trimming. There's no special trick to this part, pick a spot to start and go around the whole frame trimming with scissors. It doesn't need to look neat, the speaker will hide it.

    If the fabric tends to flip up when you install the grille, you can tape the fabric to the inside of the frame to keep it in place.

    1791429530327.png
    1791429574225.png
  4. Install the grille!
    OK, you're done building it, now gently slide it onto the speaker from the top, being careful not to scrape the IR receiver / logo too much.
    1791429640059.png


    Once the grille is in place, use elastic bands on the hooks on back to put a little tension on the grille and hold it up.

    That's it! Now you can enjoy your music knowing the little ones tweeter-poking attempts will be properly thwarted.
 

Attachments

  • PXL_20260923_165751896.jpg
    PXL_20260923_165751896.jpg
    110.8 KB · Views: 261
  • PXL_20260923_165856705.MP.jpg
    PXL_20260923_165856705.MP.jpg
    93.4 KB · Views: 262
  • PXL_20260923_171542062.jpg
    PXL_20260923_171542062.jpg
    155.5 KB · Views: 257
  • PXL_20260923_234021459.jpg
    PXL_20260923_234021459.jpg
    182.9 KB · Views: 248
Last edited:
Nice work!

Having kids myself I always imagined I would need to do something about the exposed tweeters of my speakers, but somehow they survived.

Anyway, the solution I came up with is using those childrens' fences for preventing them to fall of stairs or burn themself on a fireplace, would do the trick.

Something like this

Screenshot_20261003_064519_Firefox Focus.jpg
 
You can find grills for the LS50 on ebay

View attachment 562490
Interesting, do they stay on with magnets or something? I suppose that may have been an option for the ls60 also, but I figure a determined kid could pull that right off. The nice thing about the fabric is it hides the drivers, so far she doesn't realize there's anything interesting behind it.
 
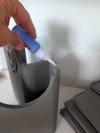
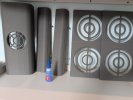
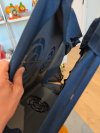
Now that the design and instructions are cloer to final, I thought I would share some of the failed attempts at building this thing and why it gave me such trouble:

The biggest (but not only) problem with the original design was that somehow I thought fabric would stretch straight across two points rather than bowing inwards. Look, you can fit everything I know about upholstery on a postcard with room for stamps, I wasn't sure, OK?

1791479665359.png

I hated how it came out and didn't take many pictures, but you can see it in the background here:

1791479782091.png

The original design also used a lattice rather than a solid surface to save plastic. It didn't actually save that much plastic but it did break a lot during assembly. It was also a PITA to work with during the modeling / design phase.

I also tried to print it in 6 pieces instead of 10, so the side grilles were split. There was a nice feature where all the pieces could snap together, but the side grilles were also built from thinner pieces, and overall it tended to break under the force needed to snap the sides together. All these thin pieces also tended to cause print failures. The thinness was intended to avoid obstructing the grilles too much with a vague notion of sound quality, but it was unworkable.

Anyway, that's where this started, somehow I had to actually build this junk to realize it wasn't going to work, but I did get there eventually.
 
Nice work!

Having kids myself I always imagined I would need to do something about the exposed tweeters of my speakers, but somehow they survived.

Anyway, the solution I came up with is using those childrens' fences for preventing them to fall of stairs or burn themself on a fireplace, would do the trick.

Something like this

View attachment 562413
I think baby gates are a good solution if you have the space to surround the speakers with them, and/or you can use them to exclude the listening area from the baby's "range"... neither applies in my case, it was grilles or nothing.
 
Back
Top Bottom