jacobacci
Member
I was wondering whether the Digi+ ever got measured? I couldn't find any thread on it.

I thought Archimago had reviewed the Digi+, but I was confusing it with his DAC review.
But he measured the JustBoom Digi, which pretty much functionally equivalent:
http://archimago.blogspot.com/2018/12/measurements-justboom-digi-spdif-hat.html
Is RoonBridge open source? I thought it was closed source.Roon Bridge is open source software, provided freely by Roon, that allows Roon-native endpoints to be created using a wide variety of devices, either DIY or commercial.
It uses the RAAT protocol to provide lossless audio streaming services without some of the downsides faced when using AirPlay or Squeezebox methods.
Before your eyes glaze over, the net result of all this is:
For about $100, and less than an hour of your time, you can create a small, dedicated, Roon endpoint that provides ethernet-based streaming and lossless 24bit/192khz digital audio output over optical and coax S/PDIF to your DAC.
Prerequisites You Will Need:
1. A computer with USB port
2. A computer running Roon Core. It doesn't matter if it's the same computer or not as #1.
3. A router or hub that has 100 megabit or better Ethernet that is within cable distance of your audio electronics
4. Ethernet cable long enough to go from your router or hub to your audio electronics
Parts You Will Need to Buy:
1. Raspberry Pi 2 Model B $40
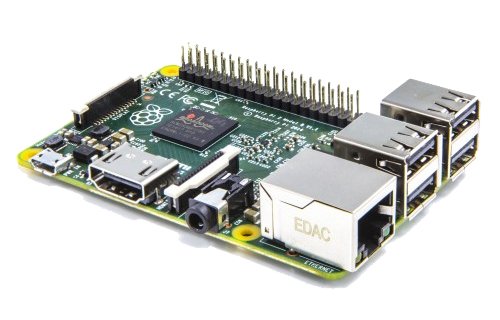
Why the 2 B and not the newer, more powerful, slightly cheaper 3 B?
The 3B's WiFi antenna is too weak-sauce, with poor QoS for high-resolution audio streaming (it's okay for Redbook), it sucks up extra CPU and bus cycles, and causes potential interference. Buying the 2B eliminates the unnecessary complication and it still has more than enough compute horsepower when running a minimal operating system to stream digital audio just fine.
If you're enough of a Linux guru to know to how to disable the WiFi services on the 3B, go ahead and get it if you prefer.
2. HiFiBerry Digi+ Pro $45
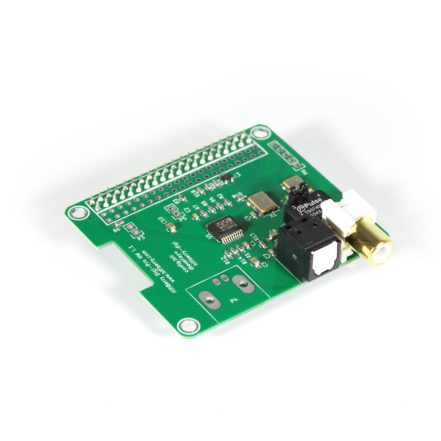
I recommend the top of the line model. For only $15 more than the Digi+ Standard, you get:
-Galvanic isolation
-Output transformer
-Dual clock oscillators for lower jitter
-You can solder on a BNC connector if you want to be badass
There is a comparison chart of different models. If you don't need or want any of the Pro features, you can get one of the cheaper ones.
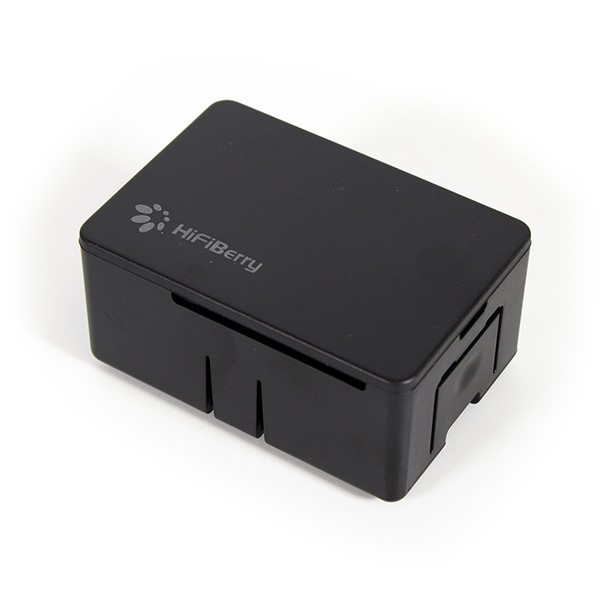
3. Case (or Not) $0 to whatever
I use the HighPi case because it's tool-free, snaps together, isn't too ugly, reasonably priced, and specially designed for HiFiBerry HATs (Hard Attached to Top, Pi-speak for daughter cards like the HiFiBerry family).
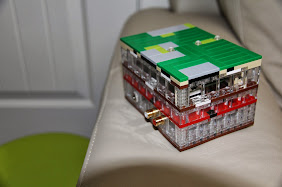
But you can also make one out of Legos...

Or go naked and use nothing at all:

4. 32 GB Micro SD Card $12

For this application, you can actually get away with the 8 GB model if you want to save $5. I prefer to spend the extra $5 in case I need more storage in the future if I repurpose the parts.
5. Optional: USB SD-Card Reader
If your computer has native SD card reading capabilities, or you already have a reader for digital cameras, you probably don't need this.
6. Optional: Micro USB 5V/2.5A Power Supply
If you have an Android phone or other micro-USB powered devices, you might have several of these lying around the house already (I did). If you don't, you'll need to buy one.
Act I: Assembling The Pi:
1. Plug the 40 PIN GPIO pin female connector of the Digi+ into the 40 PIN male connector of the Raspberry Pi
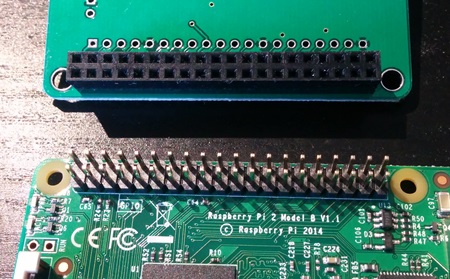
2. Stick it in your case. Or not if you're not using one.
Don't bother plugging it in and trying to turn it on; it doesn't have an operating system yet so nothing will happen except the power light will come on.
Act II: Creating the Boot Image, Configuring the Software, adding to Roon
At this point, I will direct you to the excellent guide for the software side of things already written by Roon Community member RBM.
Follow what he says step by step for your particular desktop OS with one major exception:
Because of a security update to the Raspbian Jessie Lite OS since RBM wrote the guide, you will need to do one extra step.
In the section Writing the OS to the SD Card, he says:
"The writing process will take a few minutes. When it’s finished, just close the app and eject your SD-card. Insert the freshly written SD-card into your Pi, attach network and power cables and off you go!"
Before you eject the card, you need to create a file with no extension called ssh in the root of the boot image.
If you don't do this extra step, you won't be able to remotely connect to the Pi using ssh or Putty; remote connectivity is no longer on by default for security reasons.
Once you've done that, you can proceed with the rest of his instructions as written.
Act III: Have Fun
If you follow the rest of RBM's guide you should be done and playing music.
Enjoy!
Is RoonBridge open source? I thought it was closed source.
")
Yeh I just realized that after searching and not finding it there. So went ahead and ordered it from HiFiBerry direct. At first I thought they were Chinese company when it said mailing would be without tracking and such. But once I saw that they were a swiss company I felt at ease and ordered it from them.
Their form fill by the way at check out is odd. It breaks Autofill with Chrome if you try to edit any fields.
So I made a new endpoint.
Differences this time:
RPi 4
HiFiBerry DAC 2 HD
OS: Ropieee
Can confirm it is connected to Roon Core over RAAT.
Running it over WiFi, unlike the old bridge.
New version, with case, power supply, SD Card, and other sundry parts costs $192.
I offered it up on the gear testing thread, but nobody said they wanted it tested and Amir didn't bite.
Well, tell Amir and/or reply to the thread.
Would you send it to him?
As a person who has had a bunch of these hats, I can attest to a couple things:
1. They're great. They all sound pretty good (I've bought the Hifiberry XLR, Digi+Pro, Allo Signature).
2. Even better is just getting a Raspberry Pi 4 and installing Ropieee and hooking that up to a USB DAC. This is the direction I'm going with the latest two endpoints I have in the house.
My latest build is using Pi 4 and Ropiee.
Pretty happy so far, although I haven't figured out how to control the volume within Roon yet.
I set it to DSP volume in Roon and that did nothing....moving the slider didn't change any actual volume.
Setting it to hardware is obviously the opposite problem...full output, no volume control.
And I don't want to mess around with Volumio if I'm using Roon.