Yes. I realized that after I saw the dimple - which was months later when I was moving the speakers after a leak in the ceiling almost above them (lucky break there). I just didn't have clean smooth 2x2's at my disposal and being a novice made a simple error.Tip: buffer the pressure of clamps by inserting a 2x2 between the work and the clamp. That distributes the pressure more evenly.
Jim

-
WANTED: Happy members who like to discuss audio and other topics related to our interest. Desire to learn and share knowledge of science required. There are many reviews of audio hardware and expert members to help answer your questions. Click here to have your audio equipment measured for free!
You are using an out of date browser. It may not display this or other websites correctly.
You should upgrade or use an alternative browser.
You should upgrade or use an alternative browser.
CSS Criton 1TD-X Kit Speaker Review
- Thread starter amirm
- Start date
So did i, i have the river Rhine and Ruhr in my backyard. Never got stoned either while kayaking.I guess I did a little too much kayaking last summer. They never got stained!

You might be able to fix this with a damp cloth and a pressing iron.The only thing I noticed when finished was a dimple caused by the pressure on the side of one of the speakers as I had over-cranked one of the clamps to hold the wood in place while gluing.
As for getting a bit of color on to the birch, i think i would simply use some wood oil to darken it. Like you said, you could use veneer if the result isn't as expected.
Could be done in minutes.
Both of those are good ideas. I read about the iron method this year and was skeptical that I would ever use it on a hardwood floor but it just might work on that spot on the speaker. As for the staining, one fear I have is over-sanding. I have some reading to do. Wood oil is something I hadn't considered.So did i, i have the river Rhine and Ruhr in my backyard. Never got stoned either while kayaking.
View attachment 264637
You might be able to fix this with a damp cloth and a pressing iron.
As for getting a bit of color on to the birch, i think i would simply use some wood oil to darken it. Like you said, you could use veneer if the result isn't as expected.
Could be done in minutes.
I have some beautiful places to kayak in upstate New York but I am jealous.
Don't be, this is one of the densest populated areas in Europe, behind me is industry. ;-)I have some beautiful places to kayak in upstate New York but I am jealous.
ROOSKIE
Major Contributor
Enjoying seeing the 3 or 4 DIY examples posted here.I guess I did a little too much kayaking last summer. They never got stained!
You can see residual wood glue in the pictures but it is more visible in the jpgs than with the naked eye. My S21 often sees things that I don't. There was another comment concerning the difficulty in assembling the wood. I am a complete novice at woodworking and found the box went together fairly easily. The only thing I noticed when finished was a dimple caused by the pressure on the side of one of the speakers as I had over-cranked one of the clamps to hold the wood in place while gluing. As I mentioned I am a complete novice working in wood. I don't think the little dimple is going to bother me once the cabinet is sanded and finished. It's unlikely anyone else will know it is there.
I am unsure if I will do the staining and finishing as there is a man up the road from me who does wood refinishing. I haven't brought one to him for an estimate. I also felt from the get go that if I don't like the way the stain comes out I can always do veneer as a plan B. My daughter's father-in-law is about to retire and has offered to help me learn how to veneer. My problem with doing veneer on my own without some help is that I tend to get hung up in an attempt to reach perfection. I would rather wield a soldering iron and hone my electronic diagnosis skills rather than learn woodworking.
I'm 71, work half time and have other things to do like exercise and yardwork.
Your glue job and alignment is nice. The tendency is to over-clamp but it is not necessary as wood glue does not shrink as it dries so everything just needs to be solid but not jacked.
ANyway, run them over with an orbital sander on a medium speed with some 80 grit and then some 150 and you will be good to go. You can sand with finer grit but I am not sure how that will affect the birch absorbing stain. Will depend on the product you choose.
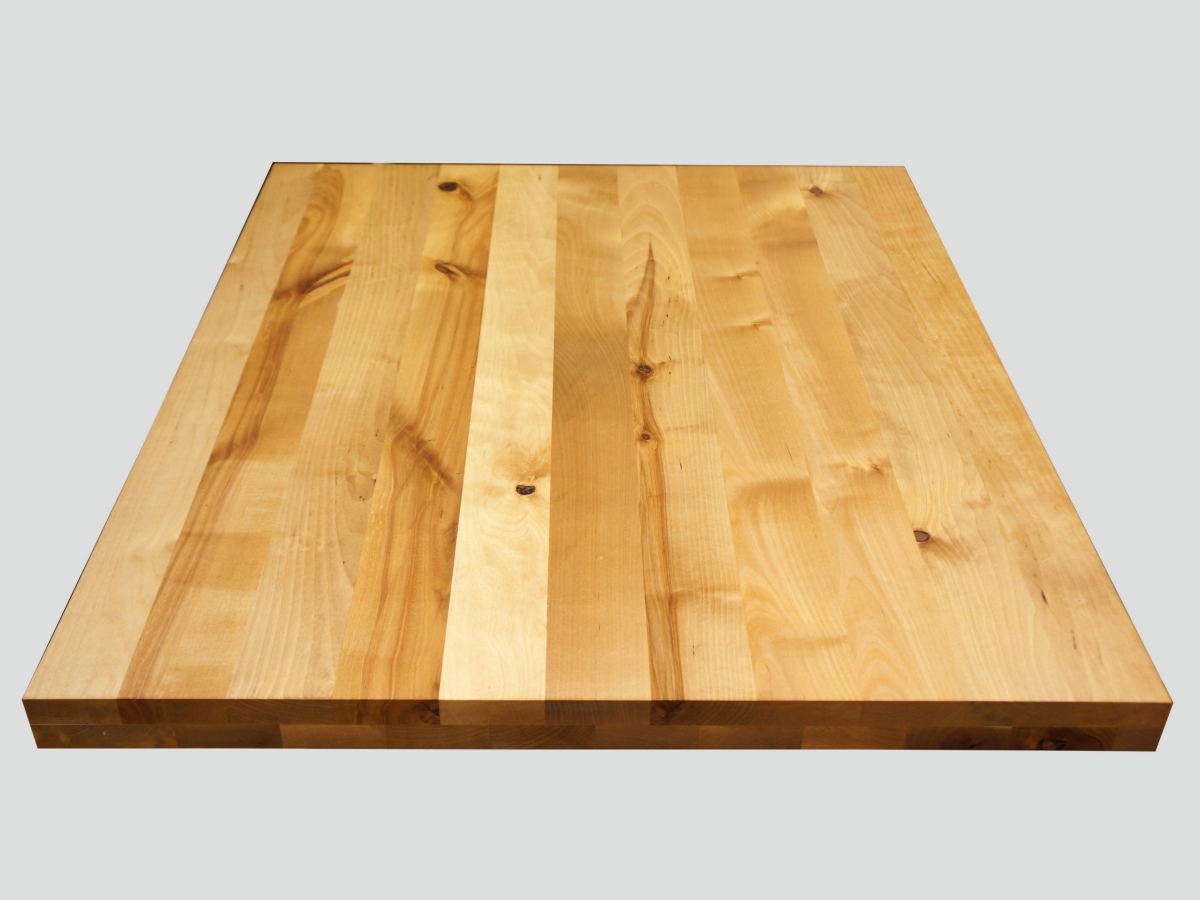
Birch ply stains splotchy sometimes, so prepare for that but the look of splotchy 'birchy-ness' is somewhat beautiful. It is, however, unlikely to look like that nice cutting board.
I have a similar enclosure that I did not stain but sanded and left natural. I did coat it with a satin poly, that brought out the grain and protects the cabs a bit.
Super fun.
To the potential DIY community:
I know a lot of folks want to talk about value propositions with DIY but I just don't see it that way anymore. (though I understand if you do & ASR is not a DIY site per say)
Going to DisneyLand costs $8k+ for a week. I'd rather spend that week free from working for money and instead make DIY speakers and other fun creative and interesting stuff. I'd actually rather make 8 pairs of speakers that I don't need vs going to Epcot center for a week. Don't get me started on $5k superbowl tickets and $20 Bud Lights. How is that fun? Anyway DIY is fun for the right folks. Money well spent.
So for the new DIY folks. If it sounds fun and you are pretty sure you are doing it for the interest, challenges, and learning and find that making something is fun ----> go for it!
If your main goal involves thinking of saving a bundle of cash or giving the middle finger to the man ------>STOP, DROP & ROLL! Put that fire out now. You will not likely be doing that. @least not with a kit. Yes a very advanced hobbyist can crush DIY with ground up designs... now do that as a newbie or novice?? Naw!
I don't go on bike rides or go golfing to save money anymore than I DIY speakers(or most DIY projects for that matter). You will not save money if you are 'charging' yourself for your time or in it to beat the latest REVEL and KEF clearance sale price.
Of course if you compare this CSS kit not to REVEL & KEF, but rather some 'boutique' brands.
Ones that also use nice drivers and really basic design elements(no waveguides, squared cabs) then the value is quite high. (of course we at ASR don't really do that
Harbeth $5k+USD https://harbeth.co.uk/c7es-3-xd-loudspeaker-2/
Trenner-Friedl $5k+USD https://www.trenner-friedl.com/index.php?menu=product&sprache=en&second=art
Dynaudio $7k+USD https://dynaudio.com/home-audio/heritage/heritage-special
Fritz LS7 $3800USD https://www.fritzspeakers.com/sound.asp
Last edited:
OP
- Thread Starter
- #146
On question of 'near-field measurements,' there is nothing fancy there. I use the robotic part of Klippel NFS to position the mic as close as I can safely get to the tweeter and make a measurement. I then move the mic, again using the robotic arm, to be in front of woofer and make that measurement. There is no fancy math or methodology here. Occasionally if possible, I disconnect the feed to the other driver when making measurements. This was not possible in this instance.
While on this topic, company got back to me and showed measurements that don't show the resonance in the woofer that I measured:

So maybe that is an issue with the sample I received.
While on this topic, company got back to me and showed measurements that don't show the resonance in the woofer that I measured:
So maybe that is an issue with the sample I received.
Prana Ferox
Addicted to Fun and Learning
Birch doesn't tend to take regular stain well, it blotches easily. I prefer gel stain on bare Baltic birch. Sanding it with fairly high grain sandpaper first seems to make the stain more even.
Wouldn't it be possible for the deep dip paired with the peak to correspond to a cancelling/emphasis effect of both drivers radiating at the same time--but varying frequency dependend phase? I've seen this before ;-)On question of 'near-field measurements, ...
So maybe that is an issue with the sample I received.
Thanks to you and everyone that responded. What do you mean by high grain sandpaper??Birch doesn't tend to take regular stain well, it blotches easily. I prefer gel stain on bare Baltic birch. Sanding it with fairly high grain sandpaper first seems to make the stain more even.
A mix of fully boutijque but also some really established hifi/hi priced manufacturer. Just for sake of argument tough,on that last Fritz speaker you show. I see a Scanspeak Illuminator woofer which sells for about 350$ each! … I am quite certain those building around a driver like that will go full out and use fancy capacitors and inductance, well just because… You are in really high end territory, wheter or not it’s worth it objectively I look at that and there is no way I can build that so it would not be worth spending 3.8K for a pair. I am quite positive that when all finished you are way past this number.Enjoying seeing the 3 or 4 DIY examples posted here.
Your glue job and alignment is nice. The tendency is to over-clamp but it is not necessary as wood glue does not shrink as it dries so everything just needs to be solid but not jacked.
ANyway, run them over with an orbital sander on a medium speed with some 80 grit and then some 150 and you will be good to go. You can sand with finer grit but I am not sure how that will affect the birch absorbing stain. Will depend on the product you choose.
Birch ply stains splotchy sometimes, so prepare for that but the look of splotchy 'birchy-ness' is somewhat beautiful. It is, however, unlikely to look like that nice cutting board.
I have a similar enclosure that I did not stain but sanded and left natural. I did coat it with a satin poly, that brought out the grain and protects the cabs a bit.
Super fun.
To the potential DIY community:
I know a lot of folks want to talk about value propositions with DIY but I just don't see it that way anymore. (though I understand if you do & ASR is not a DIY site per say)
Going to DisneyLand costs $8k+ for a week. I'd rather spend that week free from working for money and instead make DIY speakers and other fun creative and interesting stuff. I'd actually rather make 8 pairs of speakers that I don't need vs going to Epcot center for a week. Don't get me started on $5k superbowl tickets and $20 Bud Lights. How is that fun? Anyway DIY is fun for the right folks. Money well spent.
So for the new DIY folks. If it sounds fun and you are pretty sure you are doing it for the interest, challenges, and learning and find that making something is fun ----> go for it!
If your main goal involves thinking of saving a bundle of cash or giving the middle finger to the man ------>STOP, DROP & ROLL! Put that fire out now. You will not likely be doing that. @least not with a kit. Yes a very advanced hobbyist can crush DIY with ground up designs... now do that as a newbie or novice?? Naw!
I don't go on bike rides or go golfing to save money anymore than I DIY speakers(or most DIY projects for that matter). You will not save money if you are 'charging' yourself for your time or in it to beat the latest REVEL and KEF clearance sale price.
Of course if you compare this CSS kit not to REVEL & KEF, but rather some 'boutique' brands.
Ones that also use nice drivers and really basic design elements(no waveguides, squared cabs) then the value is quite high. (of course we at ASR don't really do that
Harbeth $5k+USD https://harbeth.co.uk/c7es-3-xd-loudspeaker-2/
View attachment 264638
Trenner-Friedl $5k+USD https://www.trenner-friedl.com/index.php?menu=product&sprache=en&second=art
View attachment 264639
Dynaudio $7k+USD https://dynaudio.com/home-audio/heritage/heritage-special
View attachment 264640
Fritz LS7 $3800USD https://www.fritzspeakers.com/sound.asp
View attachment 264641
Last edited:
I am not questionning the correctness of the calculations, and obviously the laws of physics have been the same before and after Klippel. A 3D approach is always necessary to try assess the performance of a loudspeaker and even if a diyer wont invest in a Klippel machine, this can also be approached with more primitive tools like a rotating table with remote control intended for photography and free software like Arta and Vituix CAD.The engineering, and in particular the mathematics used took a big leap forward once computational power exploded, motivating the development of the field. I cannot look deep behind the curtain, but I don't see any grounds for doubt about the correctness of the calculations so far. My starting point here is, that given a full 3D sound field amplitude and phase wise at a certain point in time the further development of that sound field it entirely determined by well established physics.
The Klippel apperatus seeks out to probe the sound field to some success. Hence given modern computers and strong numerical algorithms one can predict the sound field everywhere at any time in a virtual free field environment.
The idea isn't that new. Even in the 80s of the last century a similar perspective was taken when developing so called constant directivity waveguides.
The evaluation of an estimated 'predicted in room sound field' of the CEA 2034 standard is a completely different story, though.
What seems clear to me, is that the nearfield measurements taken by Amir only can give a rough idea of the individual responses of the drivers and some hints like how good or bad works a bass reflex port, but can hardly give a precise idea about the response of the separate ways of the tested loudspeaker, which would also requiere separate farfield measurements.
Of course, i can imagine that Amir is doing so in order to avoid unmounting or disconnecting any part of the loudspeaker, so that individual measurements of each driver have to be taken nearfield only... Of course It is just a guess...
I am not questionning the correctness of the calculations, and obviously the laws of physics have been the same before and after Klippel. A 3D approach is always necessary to try assess the performance of a loudspeaker and even if a diyer wont invest in a Klippel machine, this can also be approached with more primitive tools like a rotating table with remote control intended for photography and free software like Arta and Vituix CAD.The engineering, and in particular the mathematics used took a big leap forward once computational power exploded, motivating the development of the field. I cannot look deep behind the curtain, but I don't see any grounds for doubt about the correctness of the calculations so far. My starting point here is, that given a full 3D sound field amplitude and phase wise at a certain point in time the further development of that sound field it entirely determined by well established physics.
The Klippel apperatus seeks out to probe the sound field to some success. Hence given modern computers and strong numerical algorithms one can predict the sound field everywhere at any time in a virtual free field environment.
The idea isn't that new. Even in the 80s of the last century a similar perspective was taken when developing so called constant directivity waveguides.
The evaluation of an estimated 'predicted in room sound field' of the CEA 2034 standard is a completely different story, though.
What seems clear to me, is that the nearfield measurements taken by Amir only can given a rough idea of the individual responses of the drivers and some hints like how good or bad works a bass reflex port, but can hardly give a precise idea about the response of the separate ways of the tested loudspeaker, which would also requiere separate farfield measurements.
Of course, i can imagine that Amir is doing so in order to avoid unmounting or disconnecting any part of the loudspeaker, so that individual measurements of each driver have to be taken nearfield only... Of course It is just a uess...
I am afraid It is not an issue from the sample, but an issue from the measurement...On question of 'near-field measurements,' there is nothing fancy there. I use the robotic part of Klippel NFS to position the mic as close as I can safely get to the tweeter and make a measurement. I then move the mic, again using the robotic arm, to be in front of woofer and make that measurement. There is no fancy math or methodology here. Occasionally if possible, I disconnect the feed to the other driver when making measurements. This was not possible in this instance.
While on this topic, company got back to me and showed measurements that don't show the resonance in the woofer that I measured:
View attachment 264642
So maybe that is an issue with the sample I received.
A 10db peak is common place as a result of cone breakup modes.
I insist that what is wrong is your assessment using a nearfield measurements which can only give you a hint about that bump, but nothing more. Or yes, something more: nulls in the woofer's response that are mere artifacts of the nearfield measurements.
Last edited:
A 3D approach is always necessary to try assess the performance of a loudspeaker and even if a diyer wont invest in a Klippel machine, this can also be approached with more primitive tools like a rotating table with remote control intended for photography and free software like Arta and Vituix CAD.
Alas, that is not the case. In order to feed the algorithms for numerically solving the sound radiation differential equation one needs a quite complete picture of the slice of the sound field, from where it starts ... . That for the robot, so many points, the precision.
That is regarding the individual driver's nearfield measurement. They are just a sketch, and the peak (with the previous dip) is due to interference with the tweeter's output. You don't see that in the depicted tweeter's individual output because the woofer is too directional that high. So the tweeter appears to be more isolated from the woofer as is the woofer from the tweeter.I am afraid It is not an issue from the sample, but an issue from the measurement...
Last edited:
Well, If you really like that pricy toy buy yourself a Klippel and please stop despising older but also well established and reliable proceedings.Alas, that is not the case. In order to feed the algorithms for numerically solving the sound radiation differential equation one needs a quite complete picture of the slice of the sound field, from where it starts ... . That for the robot, so many points, he precision.
Last edited:
Both responses are totally distorted by nearfield measurement artifacts.That is regarding the individual driver's nearfield measurement. They are just a sketch, and the peak (with the previous dip) is due to interference with the tweeter's output. You don't see that in the tweeters graph because the woofer is too directional that high.
Btw what Amir is doing here has nothing to see with what Klippel calls "Nearfield" measurements in their folder. It is simply the old Keele method of nearfield measurement used for obtaining the low frequency response of the loudspeaker, but not valid for the upper part of the speactrum. Amir is using in this case the Klippel stuff to do the same as dyiers have been doing for years with Arta, Holmimpulse, Clio, etc...
O/k, hopefully I can settle the case. The Klippel is a quite elaborated machine in order to gather data that is then used to predict (precisely, by math) the free-field radiation of a loudspeaker. I feel that in general such comprehensive data is not needed, especially when one has access to the speaker in the dedicated listening room for individual, subjective evaluation.Well, If you really like that pricy toy buy yourself a Klippel and please stop despising older but also well established and reliable proceedings.
But the full data derived from the probe's input and sophisticated math is needed to feed the CEA 2034 as the now new industry standard. The latter is used to kind of optimize the product to max market acceptance taking with it all the virtues that a standard provides.
Last edited:
There is nothing subjective in Keele's method, basically maths.O/k, hopefully I can settle the case. The Klippel is a quite elaborated machine in order to gather data that is then used to predict (precisely, by math) the free-field radiation of a loudspeaker. I feel that in general such comprehensive data is not needed, especially when one has access to the speaker in the dedicated listening room for individual, subjective evaluation.
But the full data derived from the probe's input and sophisticated math is needed to feed the CEA 2034 as the now new industry standard. The latter is used to kind of optimize the product to max market acceptance taking with it all the virtues that a standard provides.Nothing more to say, me thinks.
Prana Ferox
Addicted to Fun and Learning
Like go down to 320 or 400 gritThanks to you and everyone that responded. What do you mean by high grain sandpaper??
As a avid 45 year woodworker with 70+ clamps of various configurations, from experience I say the the damp cloth and iron will and has worked to raise dents. The best results come when one puts a few drops over the bare wood dented area only for 2-3 minutes, letting it soak and leaving the surrounding wood dry. The cloth should be damp not soaking and repeat the process a couple of times if there is not full recovery and again only wet the dented area.Like go down to 320 or 400 grit
Gel stains are like paint they sit on surface and generally are slightly opaque so they hide many problems. My best luck has been with 220 grit sandpaper, hand sanding with the grain only on the final pass, leaving a little tooth parallel to the grain that can never be detected. After staining, the stain can be completely removed by sanding again with 220 and one can try again. You need two coats of finish to protect the thin stain layer.
Thanks to everyone again.As a avid 45 year woodworker with 70+ clamps of various configurations, from experience I say the the damp cloth and iron will and has worked to raise dents. The best results come when one puts a few drops over the bare wood dented area only for 2-3 minutes, letting it soak and leaving the surrounding wood dry. The cloth should be damp not soaking and repeat the process a couple of times if there is not full recovery and again only wet the dented area.
Gel stains are like paint they sit on surface and generally are slightly opaque so they hide many problems. My best luck has been with 220 grit sandpaper, hand sanding with the grain only on the final pass, leaving a little tooth parallel to the grain that can never be detected. After staining, the stain can be completely removed by sanding again with 220 and one can try again. You need two coats of finish to protect the thin stain layer.
Similar threads
- Replies
- 149
- Views
- 28K
- Replies
- 330
- Views
- 42K
- Replies
- 295
- Views
- 54K
- Poll
- Replies
- 333
- Views
- 52K
- Poll
- Replies
- 362
- Views
- 50K